

Lights, Camera, Hair Extensions! A Guide to Perfect Hair Extension Photography
In this blog post, we will unravel the secrets behind capturing stunning images of your Belt Hair Extensions, providing you with the tips and tricks to make your photos stand out from the rest. But, wait a minute - if you think we're going to talk about actual belts, think again! Buckle up, and let's dive into the fascinating world of hair extension photography, where style and glamour reign supreme.
Why Hair Extension Photography Matters
If a picture is worth a thousand words, then a photograph of your Belt Hair Extensions is worth a million. In today's highly visual and social media-driven world, having top-notch images of your hair extensions is essential for showcasing their beauty and attracting potential customers. But how do you capture the essence of your hand-tied extensions in a photograph? Worry not, for we've got you covered with our ultimate guide to hair extension photography.
The Perfect Setup: Location, Lighting, and EquipmentLocation, Location, Location!
Before we start snapping away, let's talk about the importance of location. Whether you prefer an indoor studio or an outdoor setting, the backdrop for your hair extension photoshoot should complement the colors and style of your extensions. Keep it simple, yet chic, to let your Belt Hair Extensions take center stage.
Let There Be (Perfect) LightNo matter how fabulous your hair extensions are, if the lighting is off, your photos will fall flat. Natural light is your best friend, but if that's not an option, invest in some professional lighting equipment. Play around with different angles and intensities to create the perfect mood and bring out the beauty of your hand-tied extensions.
Equip Yourself with the Right ToolsTo get that magazine-worthy shot, you'll need a high-quality camera and a tripod for stability. Don't forget about photo editing software to fine-tune your images and make them truly shine.
Strike a Pose: Posing Tips and Tricks for Hair Extension PhotographyHair Extension Models: The Real Deal or a Mane-quin?
One of the first decisions you'll have to make is whether to use a live model or a mannequin to showcase your Belt Hair Extensions. Both options have their pros and cons, but remember that the key is to make your extensions look as natural and glamorous as possible.
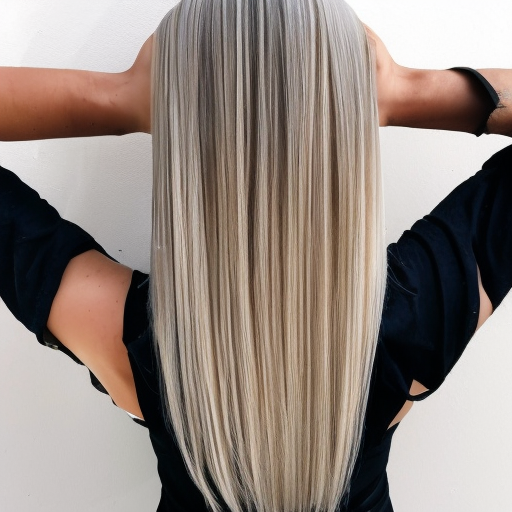
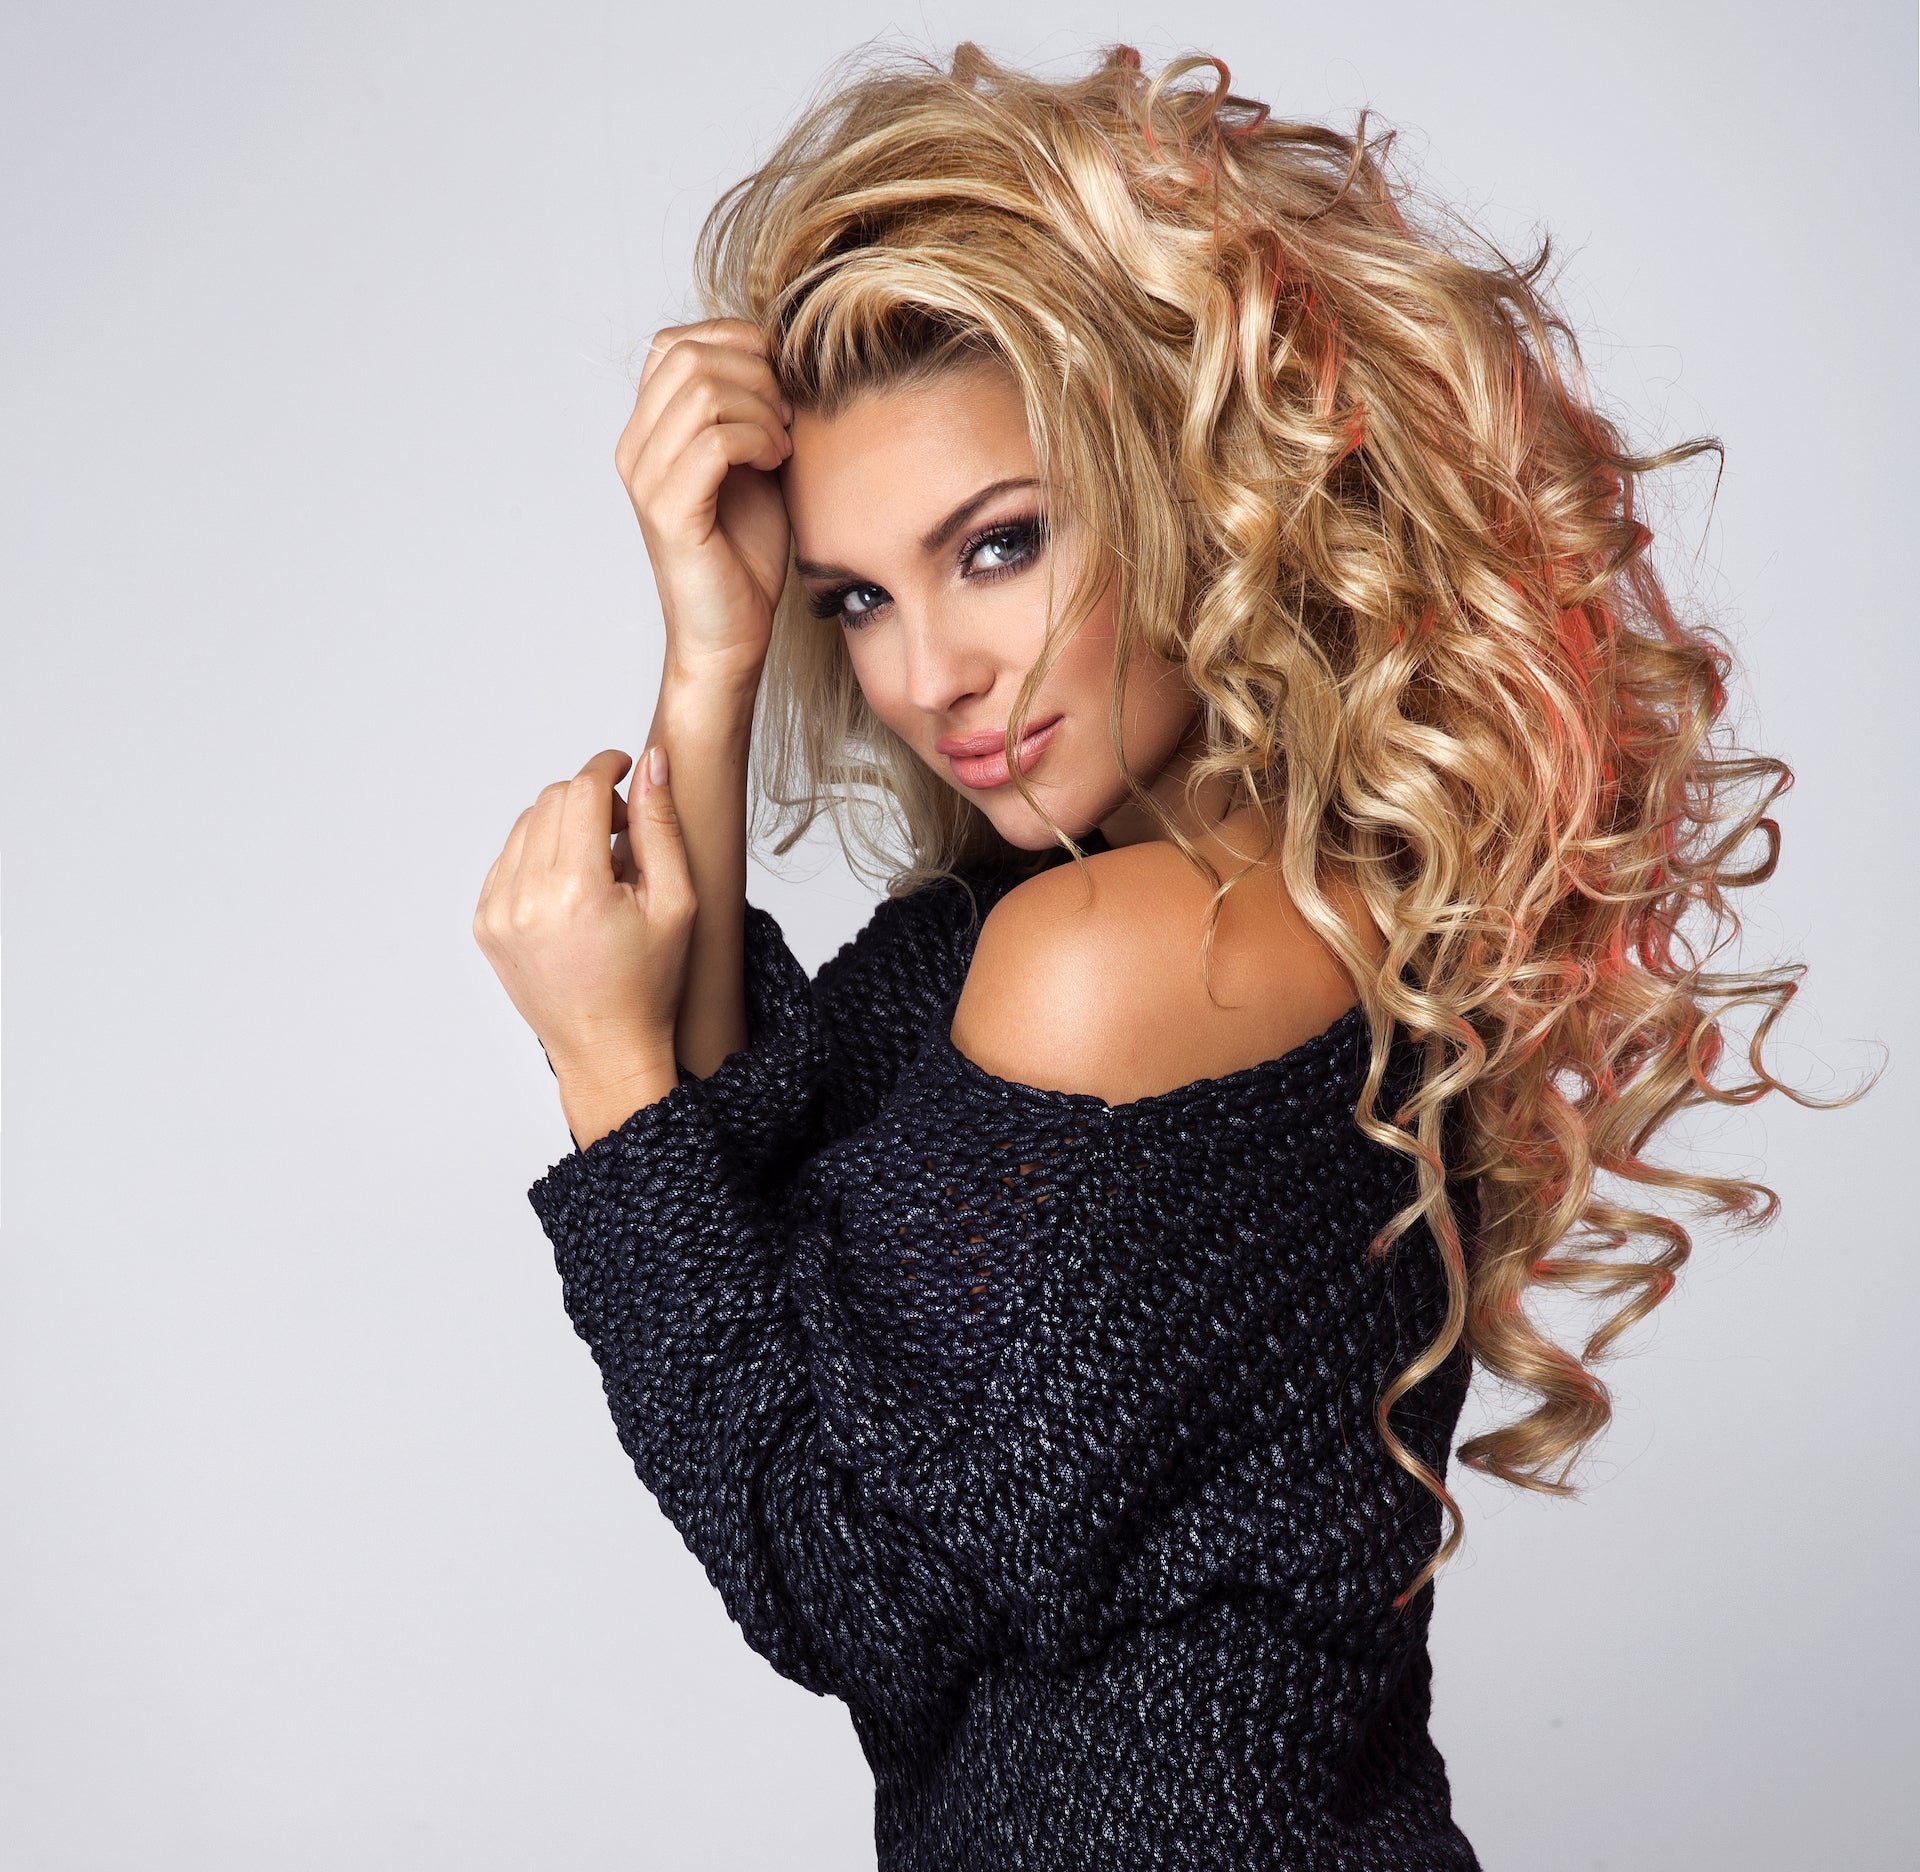
Show Off Those Hand-Tied ExtensionsWhen it comes to hair extension photography, you'll want to highlight the unique features of your Belt Hair Extensions, such as the seamless blend and the craftsmanship of the hand-tied extensions. Experiment with different hairstyles and angles to showcase these aspects.
The Art of PosingWhether you're working with a model or a mannequin, the right pose can make all the difference. Encourage your model to play with their hair, toss it around, or run their fingers through it to create movement and showcase the natural flow of the extensions.
The Finishing Touches: Editing and Sharing Your MasterpiecesPolish Your Photos to Perfection
Even the most expertly taken photographs may need a little touch-up. Use editing software to adjust the brightness, contrast, and saturation, as well as to remove any imperfections or stray hairs. The goal is to create a flawless image that highlights the beauty of your Belt Hair Extensions.
Sharing is Caring
Now that you have your stunning hair
continue
Bonus Tips: Capturing Different Hair Extension Styles and Techniques
A Tale of Different Textures
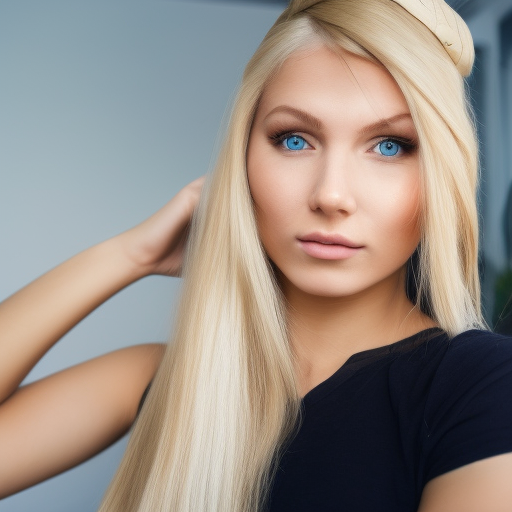
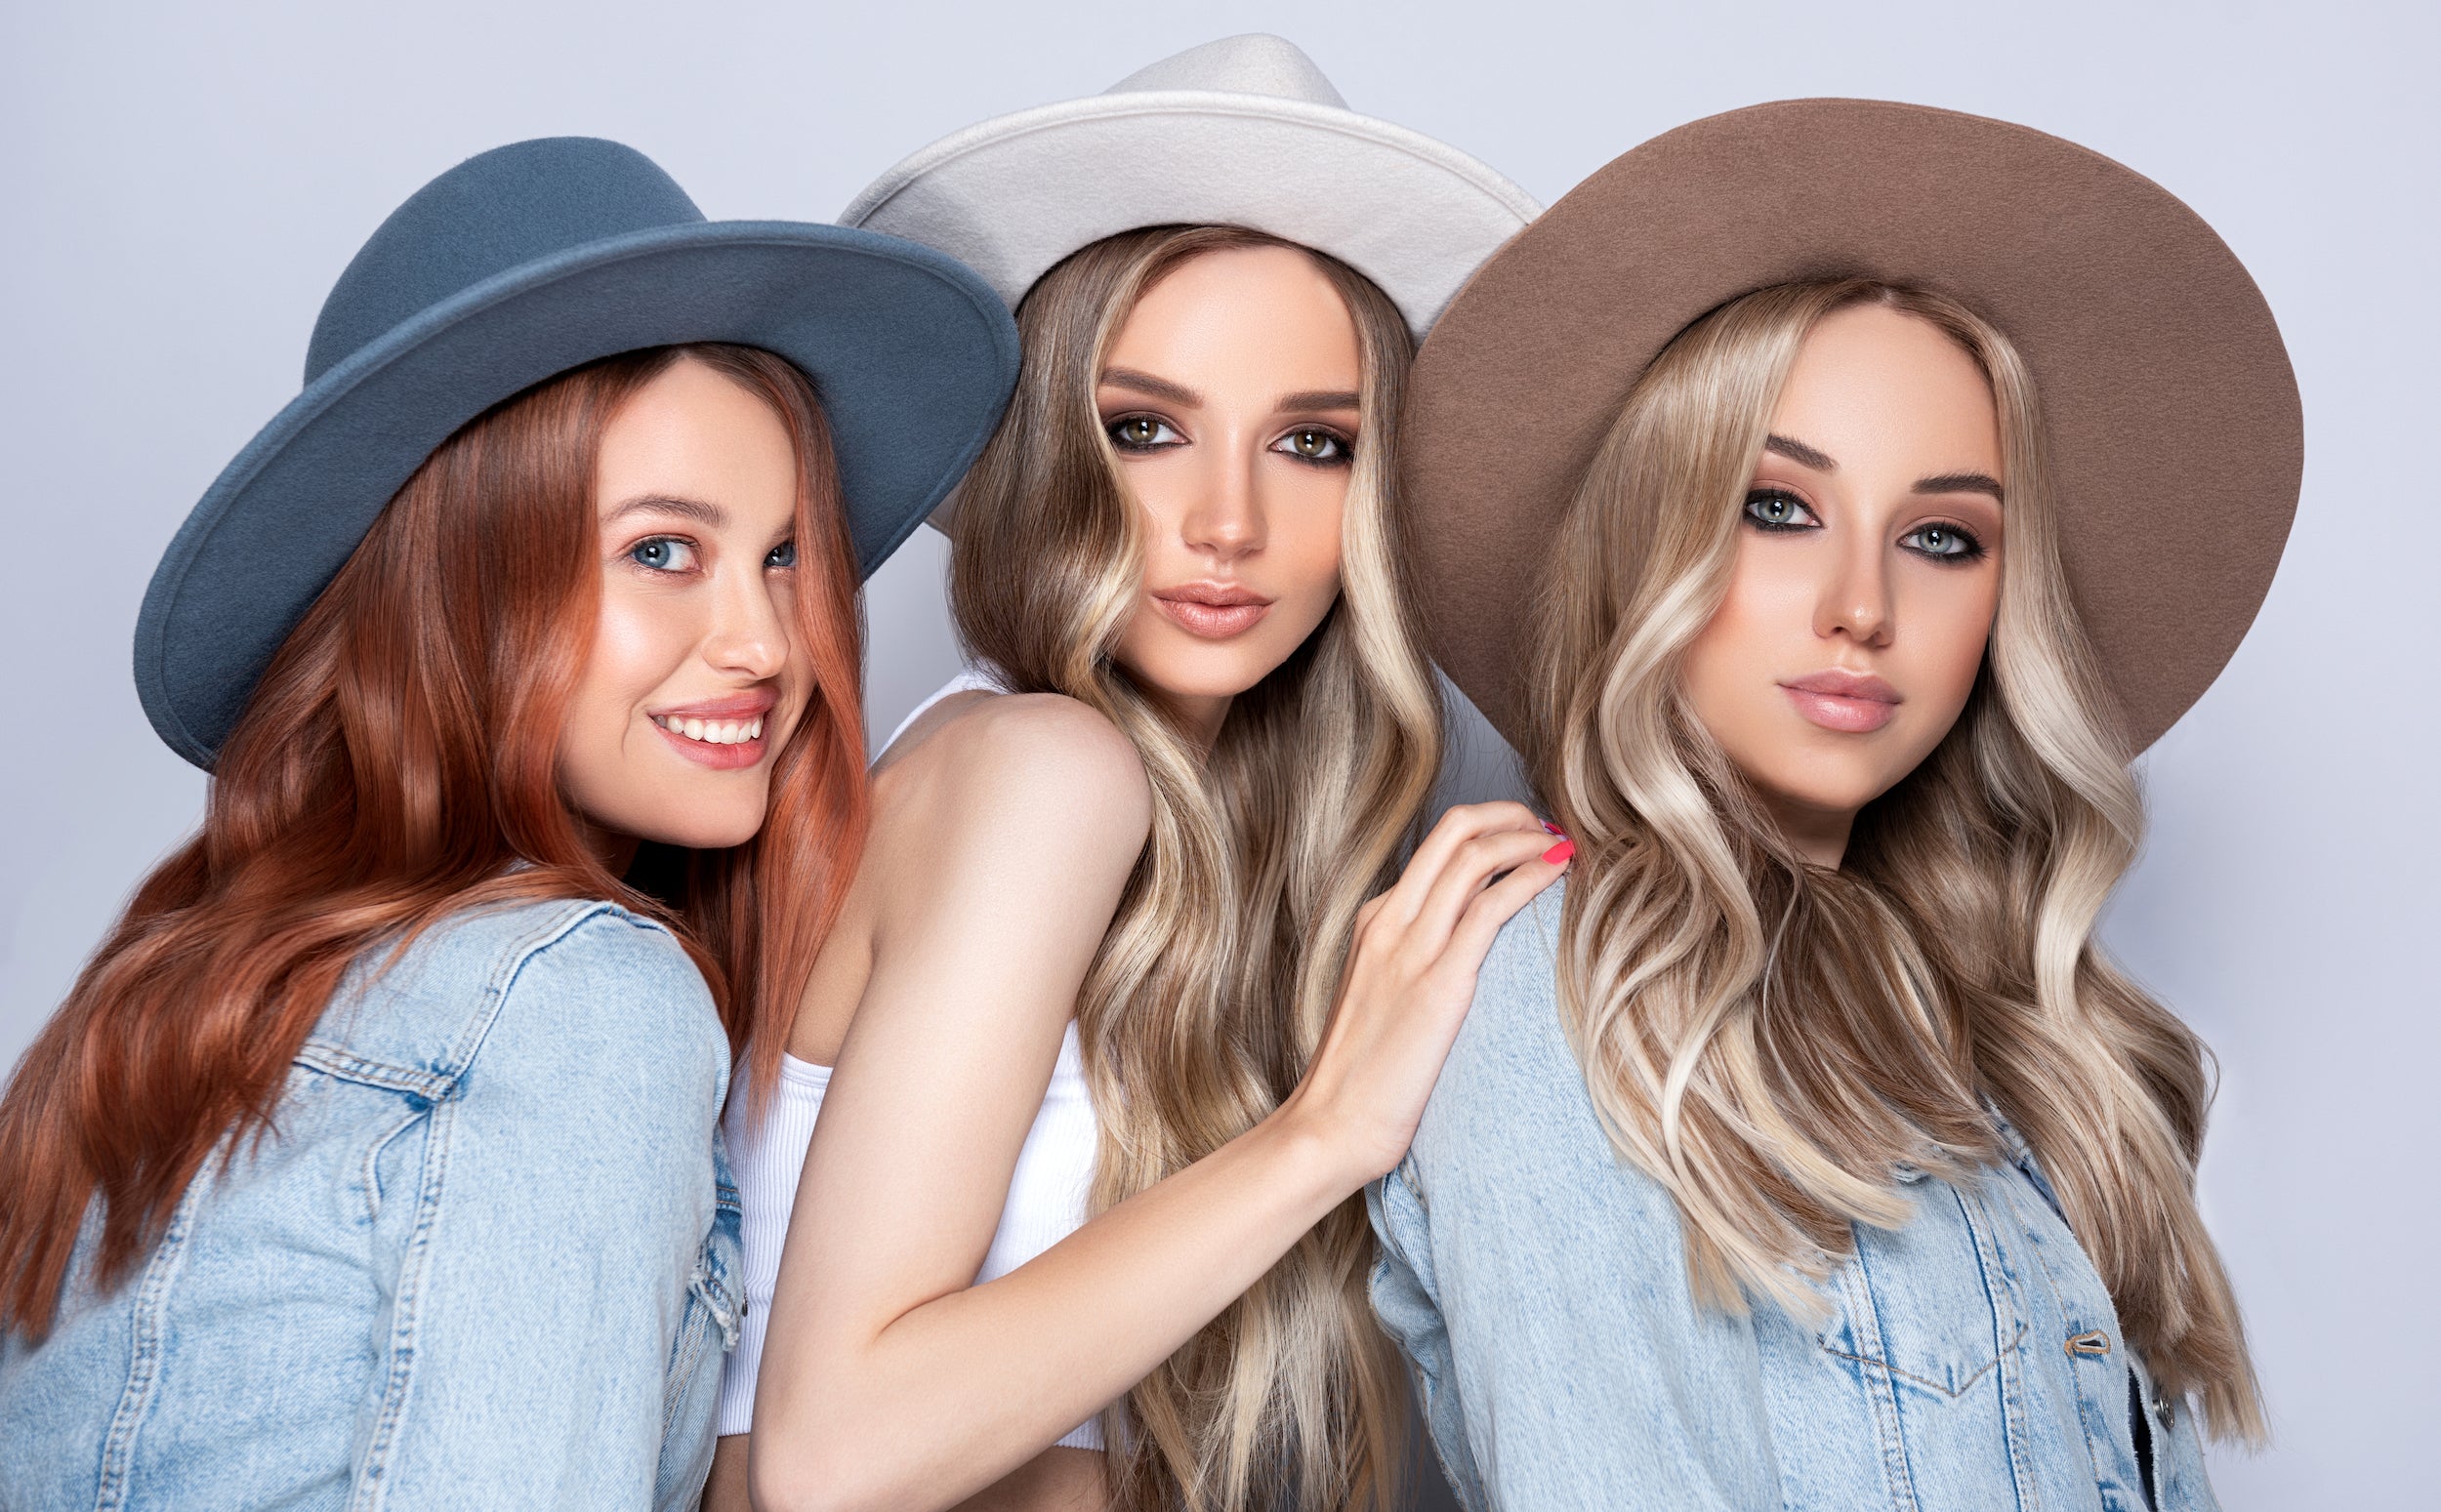
Belt Hair Extensions come in various textures, from sleek and straight to wavy and curly. To make the most of your hair extension photography, be sure to capture the uniqueness of each texture. Experiment with different lighting and poses to highlight the distinct qualities of each style.
Color Me Beautiful
Showcase the vibrant and diverse color options available in your Belt Hair Extensions collection. Use color theory to your advantage by choosing complementary backdrops and props that make the colors pop. Remember, a picture-perfect color combination can create a visually stunning and unforgettable image.
Focus on the Details
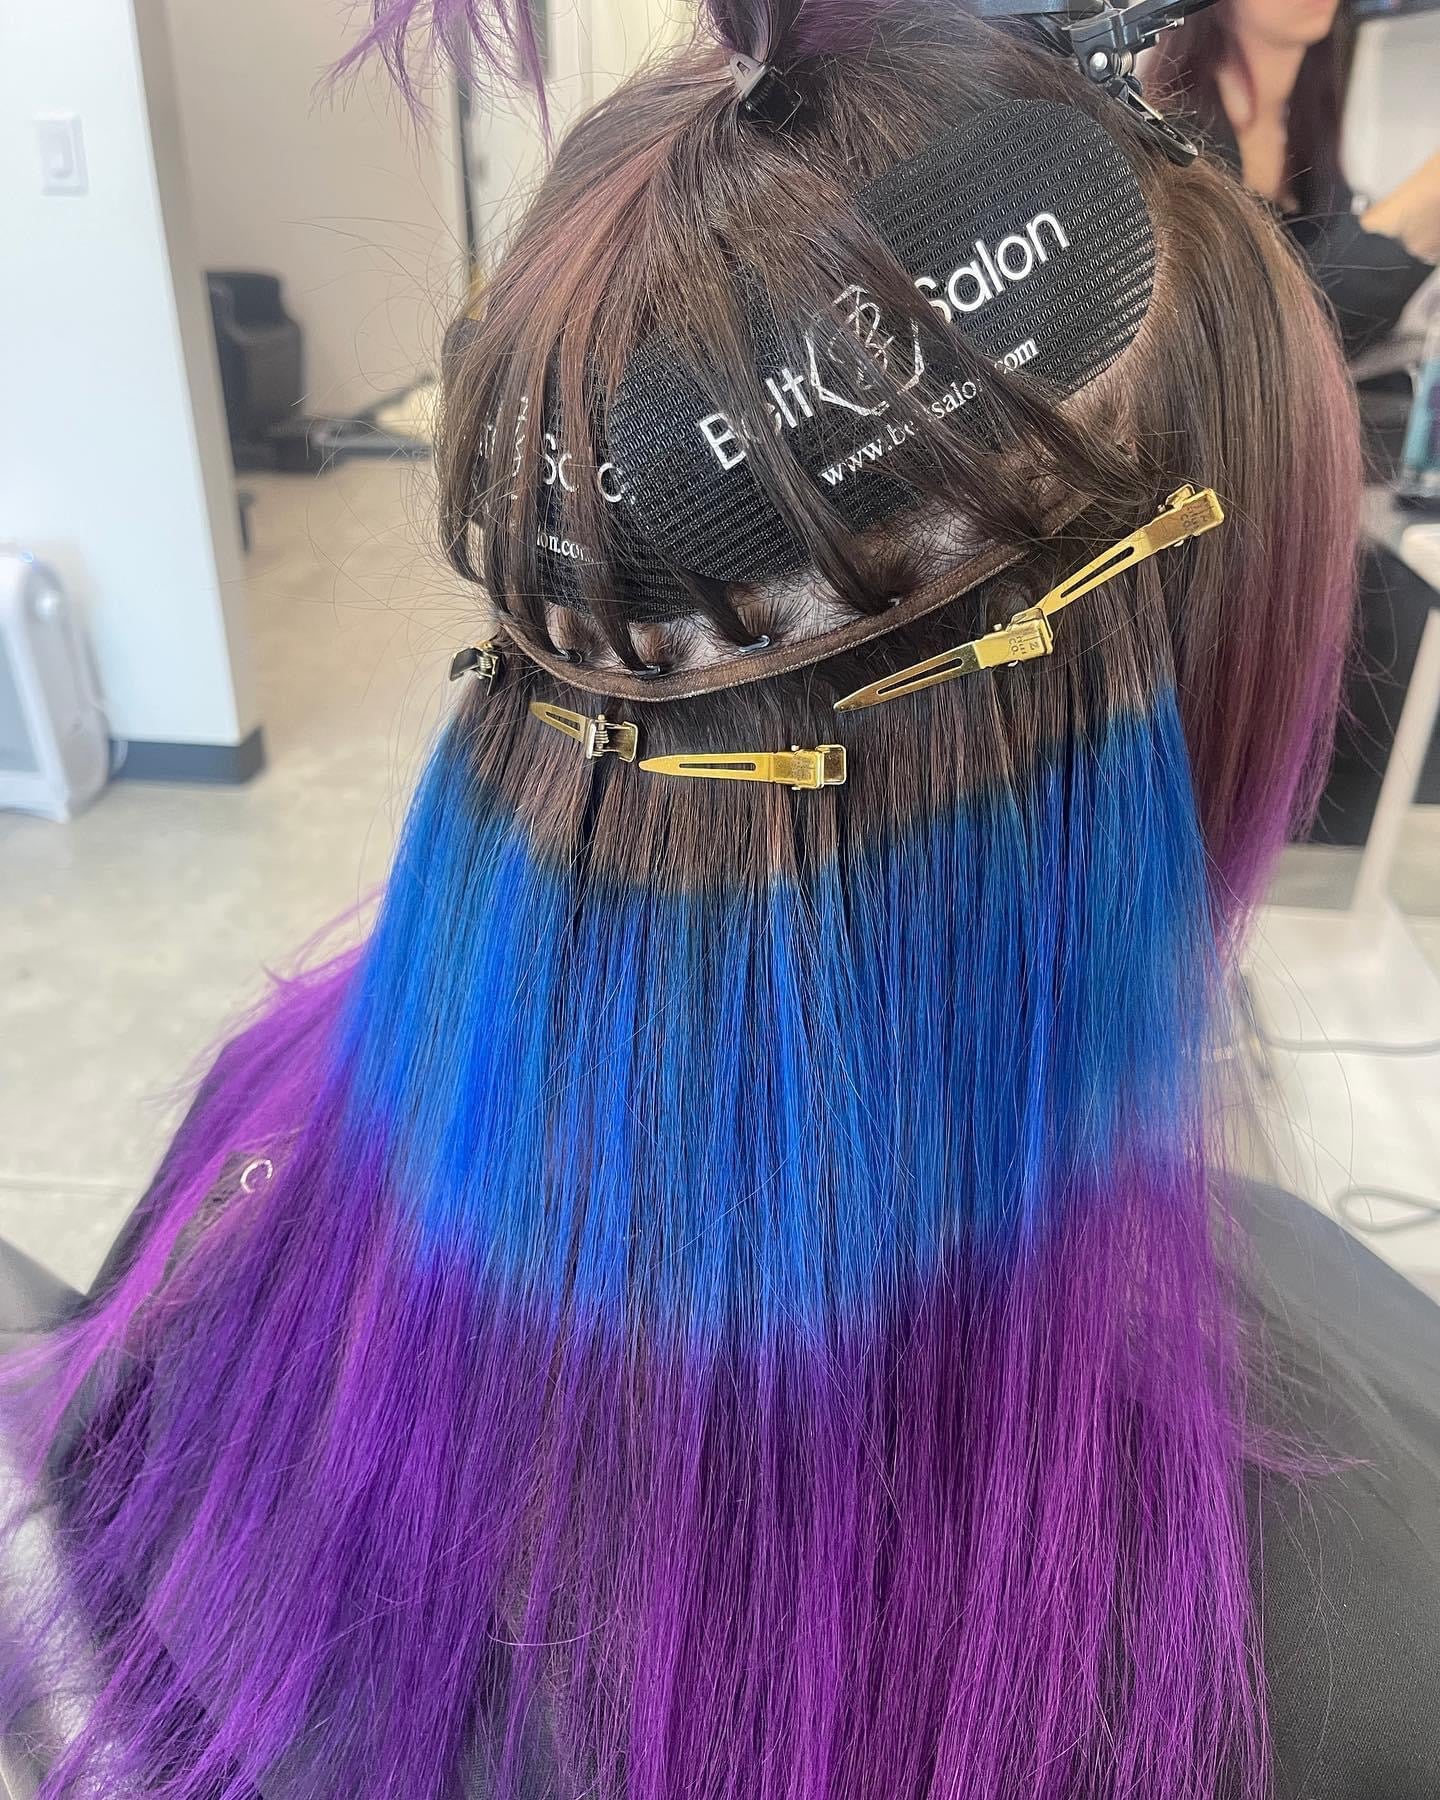
The artistry of hand-tied extensions is what sets Belt Hair Extensions apart from the rest. To emphasize the intricate details, take close-up shots that showcase the craftsmanship and quality of your extensions. These images will not only look stunning but also provide potential customers with valuable information about your product.
In Conclusion: Unleash Your Inner Photographer and Capture the Beauty of Your Belt Hair Extensions
Hair extension photography is a fantastic way to showcase the elegance and versatility of your Belt Hair Extensions. By following these tips and tricks, you'll be well on your way to capturing mesmerizing images that will leave your audience in awe. Remember, practice makes perfect, so keep experimenting with different styles, techniques, and ideas to create a visually stunning portfolio of your hand-tied extensions.
Now, go forth and conquer the world of hair extension photography! With a little creativity and the right know-how, you'll soon have an eye-catching collection of images that showcase the beauty, style, and craftsmanship of your Belt Hair Extensions. Lights, camera, hair extensions - and action!
Frequently Asked Questions: Hair Extension Photography Demystified
Q: Can I use my smartphone to take professional hair extension photos?
A: While smartphones have come a long way in terms of camera quality, they may not provide the level of detail and control needed for professional hair extension photography. However, if you're on a budget or want to capture images for casual use, smartphones can still be a viable option. Just make sure to take advantage of their built-in editing features and use good lighting to enhance your photos.
Q: What types of backgrounds should I use for my hair extension photos?
A: When selecting a background for your hair extension photography, opt for something simple and neutral that won't distract from the main focus – your gorgeous Belt Hair Extensions. Light-colored or white backdrops work well as they help to create a clean, professional look. If you prefer a more creative approach, experiment with textured or patterned backgrounds that complement the colors and style of your extensions.
Q: How can I make my hair extension photos stand out on social media?
A: To make your hair extension photos stand out on social media platforms, focus on creating eye-catching, high-quality images that showcase the beauty and versatility of your Belt Hair Extensions. Use creative angles, poses, and lighting to make your photos unique and engaging. Additionally, optimize your posts with relevant hashtags and captions to increase visibility and attract potential customers.
Q: Should I hire a professional photographer for my hair extension photoshoot?
A: Hiring a professional photographer can be a worthwhile investment if you want to ensure top-notch quality and a professional look for your hair extension images. However, if you're on a budget or prefer a DIY approach, you can still achieve great results by following the tips and tricks outlined in this blog post. Just remember to practice, experiment, and have fun while capturing the beauty of your Belt Hair Extensions!
Q: How do I handle hair extension photography for different hair lengths?
A: When photographing Belt Hair Extensions for various hair lengths, focus on showcasing how your extensions can seamlessly blend with and enhance the natural hair. For shorter hair lengths, you may want to highlight the added volume and length achieved with your hand-tied extensions. For longer hair lengths, showcase the versatility and styling options that your extensions provide.
With the wealth of information and tips provided in this blog post, you are well-equipped to dive into the captivating world of hair extension photography. Embrace your creativity, stay true to your brand, and most importantly, have fun showcasing the allure and elegance of your Belt Hair Extensions. So, grab your camera, find your muse, and start capturing the essence of your beautiful hand-tied extensions – one stunning photo at a time.
Behind the Scenes: Preparing for Your Hair Extension Photoshoot
Now that we've covered the essentials of hair extension photography, let's take a peek behind the scenes and explore the steps to prepare for your photoshoot.
Planning Your Photoshoot
Before diving into the actual photoshoot, spend some time planning and organizing the details. This includes selecting the models or mannequins, choosing the location and backdrop, preparing the hair extensions, and outlining the specific shots you want to capture. A well-planned photoshoot will save you time and ensure that you achieve the desired results.
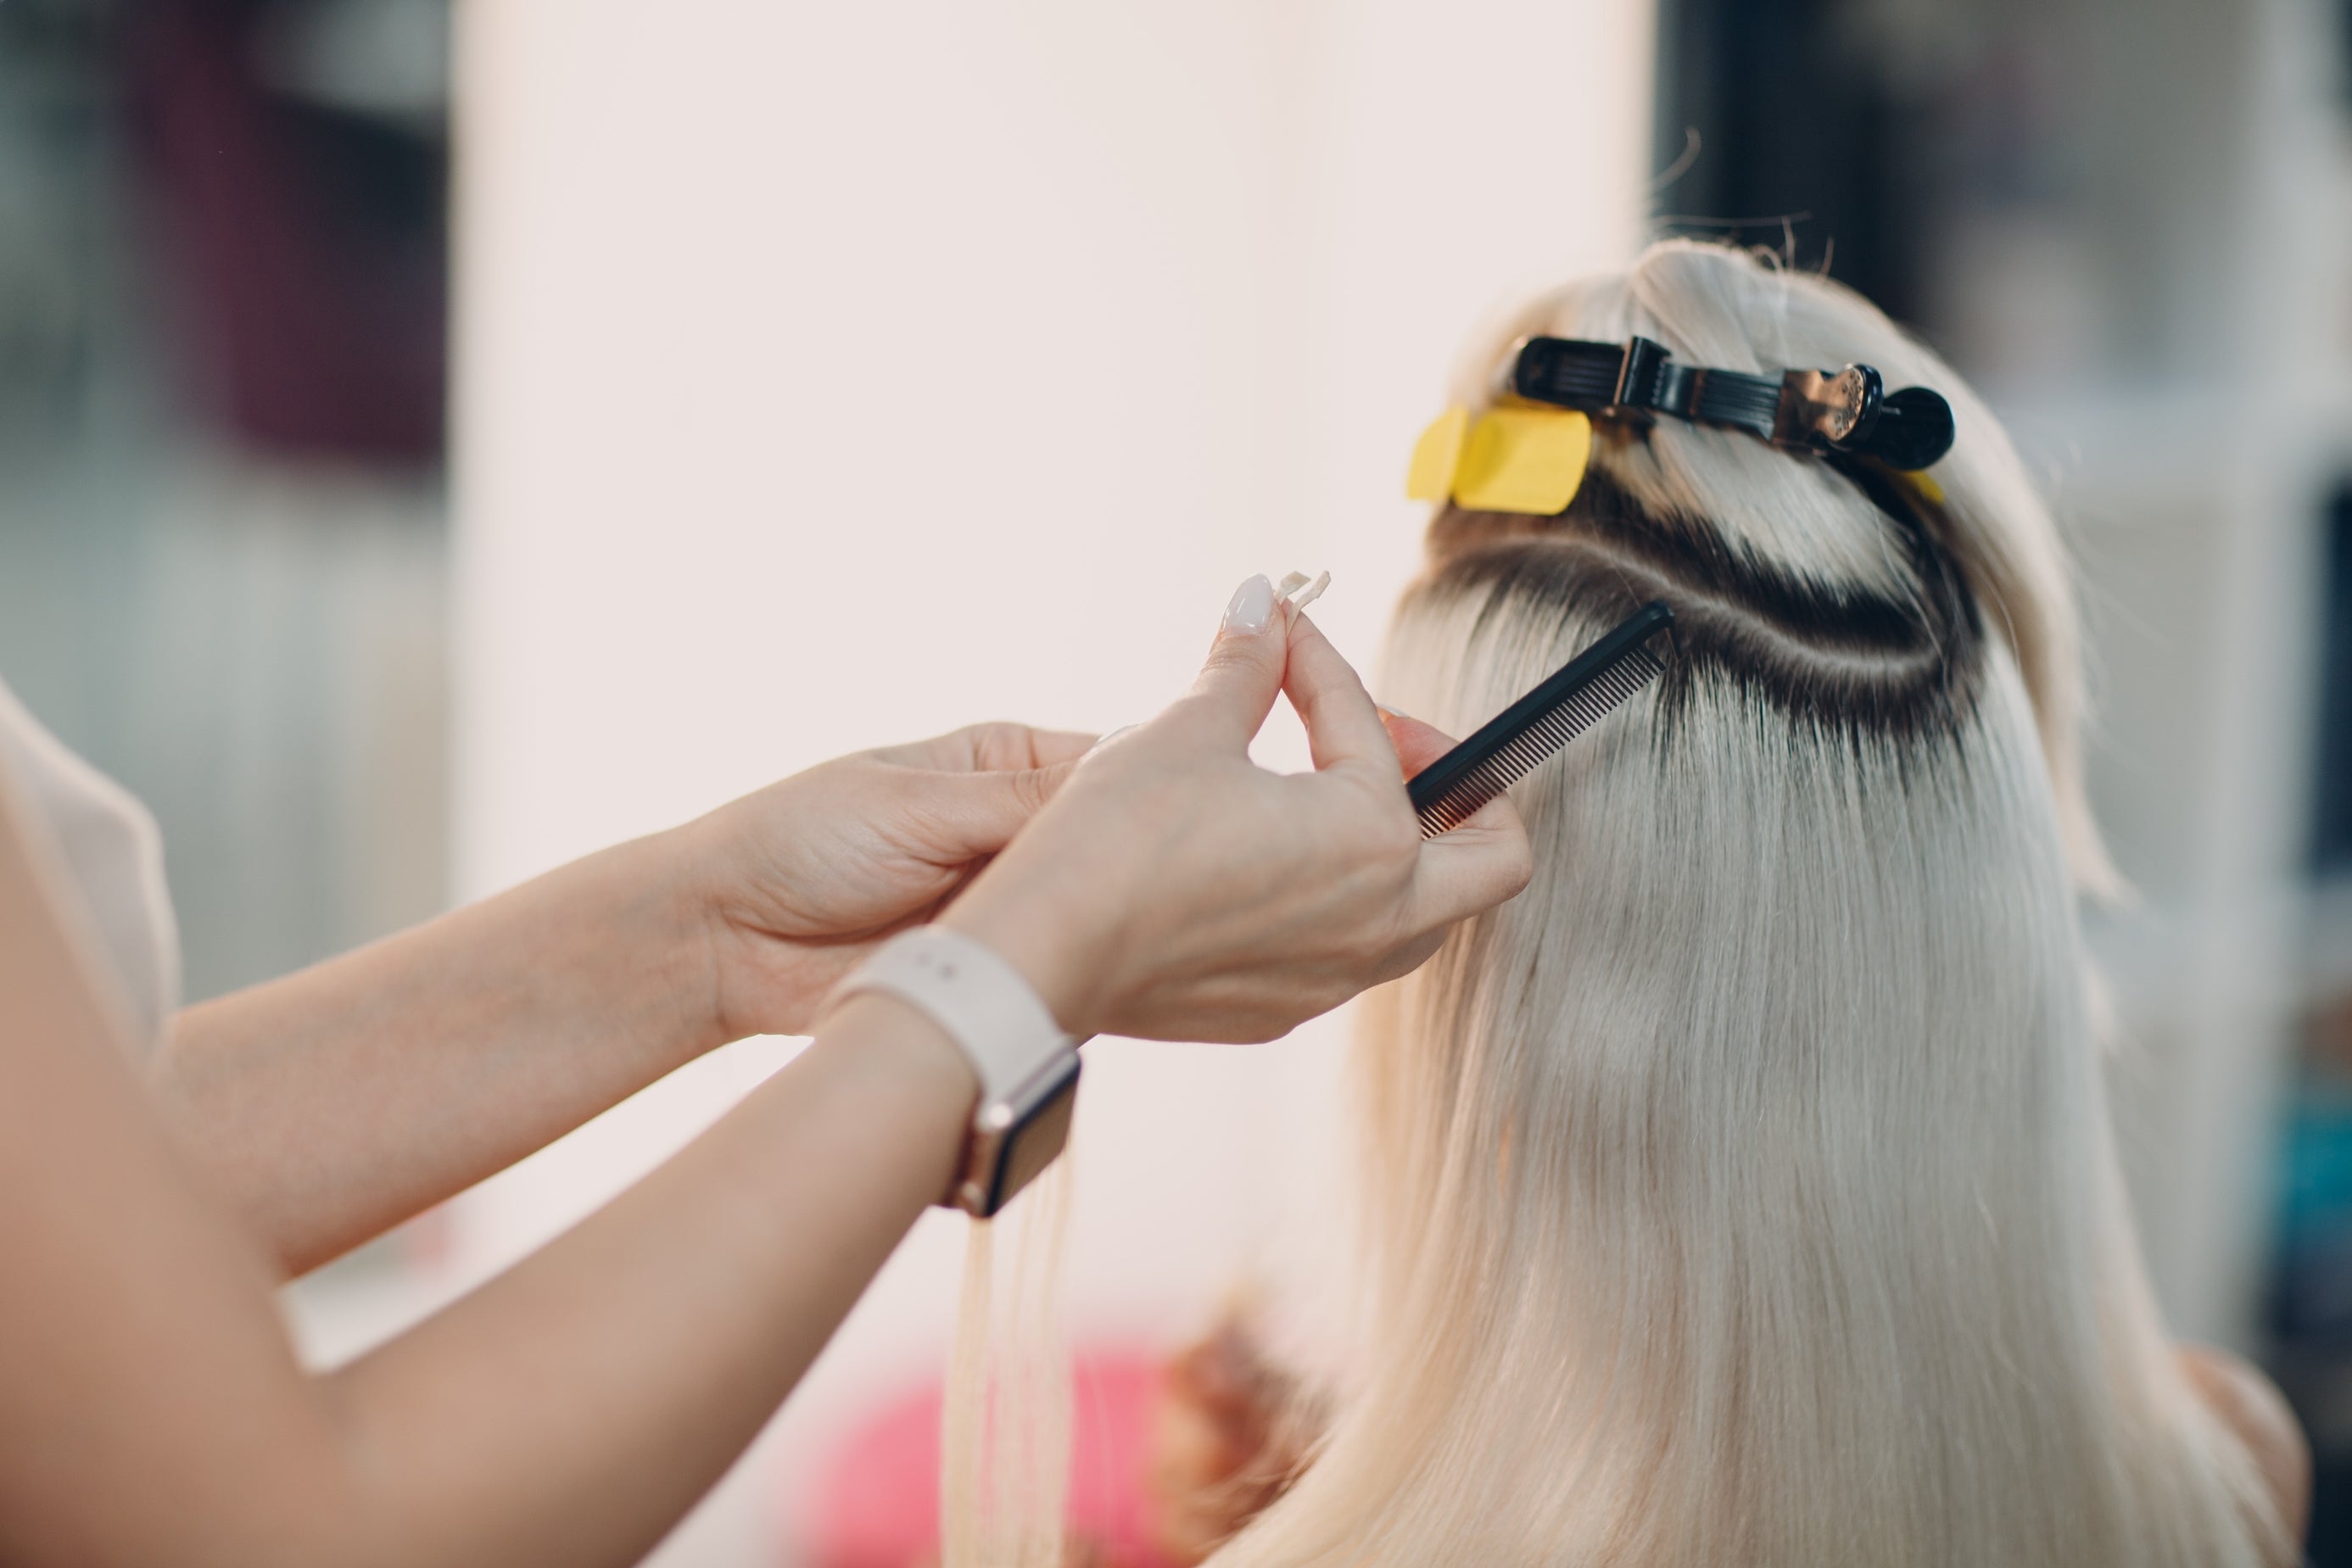
Prepping Your Belt Hair Extensions
To make your Belt Hair Extensions look their absolute best, invest some time in proper preparation. This includes washing, conditioning, and styling the extensions to create a natural, seamless blend with the model's hair or mannequin's head. Don't forget to bring along essential styling tools, such as brushes, combs, and hairpins, to make any necessary adjustments during the photoshoot.
Creating a Mood Board
A mood board is a fantastic tool for visualizing the overall aesthetic of your photoshoot. Collect images, color swatches, and style inspiration to create a cohesive vision for your hair extension photography. This will help you and your team (if you have one) stay focused and ensure that the final images align with your brand's identity.
Assembling Your Dream Team
While it's possible to execute a hair extension photoshoot on your own, having a team of talented individuals can make the process smoother and more enjoyable. This may include a professional photographer, hair stylist, makeup artist, and even a wardrobe stylist to create a polished and cohesive look. Communicate your vision clearly to your team and ensure that everyone is on the same page to achieve the best results.
Post-Photoshoot: Analyzing and Learning from Your Hair Extension Photography Experience
Once your hair extension photoshoot is complete, take some time to analyze the results and learn from the experience. Evaluate the images to identify areas where improvements can be made, such as lighting, posing, or styling. This will help you refine your skills and approach for future photoshoots.
Additionally, gather feedback from your team and audience to gain insights into what resonated with them and what could be enhanced. This valuable information will help you make informed decisions for your future hair extension photography projects.
In conclusion, hair extension photography is a thrilling journey that allows you to showcase the beauty and artistry of your Belt Hair Extensions. By following the tips and advice outlined in this comprehensive guide, you'll be well on your way to capturing stunning images that will captivate your audience and set your brand apart. So, embrace your inner artist, take a deep breath, and get ready to conquer the world of hair extension photography – one fabulous photo at a time!
Leave a comment