

Mastering the Art of Hair Extensions: Expand Your Stylist Offerings
The growing popularity of human hair extensions can be attributed to various factors, including the desire for instant hair transformations, versatility in styling, and the ability to experiment with different looks without commitment. With celebrities and social media influencers frequently showcasing stunning hair extensions, the demand for these services has skyrocketed, presenting hairstylists with an exciting opportunity for business growth.
By offering hair extension services, stylists can tap into a lucrative market, attracting a diverse range of clients who seek to enhance their natural hair with added length, volume, or color. As hair extensions cater to different needs and preferences, they appeal to a broad audience, enabling stylists to expand their clientele significantly. Or you could completely ignore them and let your neighbor stylists book all the business.

In addition to attracting new customers, hair extension services provide an opportunity for increased income. Since the cost of extensions varies depending on the type, quality, and installation method, stylists can offer various pricing options to accommodate different budgets. Moreover, as hair extensions require regular maintenance, clients will likely return for follow-up appointments, ensuring a steady revenue stream. This repeat business contributes to a stylist's income and helps build long-lasting client relationships.
By embracing the hair extension trend and incorporating it into their service offerings, hairstylists can enhance their skill set, broaden their clientele, and ultimately boost their income potential in the competitive world of hair and beauty.

Types of Human Hair Extensions
In the world of hair extensions, there is a wide variety of options to suit different preferences, hair types, and lifestyles. As a hairstylist, you must familiarize yourself with these various methods to provide your clients with the best solutions for their unique needs. Here's an introduction to some of the most popular human Remy hair extension options:
Clip In Hair Extensions:
Clip in extensions are temporary and easy to use, consisting of wefts with small clips attached that can be quickly applied and removed. They are ideal for clients who want to experiment with different looks without long-term commitment or potential damage to their natural hair.
Tape in Extensions:
Tape in extensions involves thin, pre-taped wefts that are applied by sandwiching a section of the client's hair between two adhesive strips. They are lightweight, versatile, and can last up to 6-8 weeks with proper care. This method is popular due to its relatively quick application time and minimal damage to natural hair.
Sew-ins:
Also known as weave extensions, sew-ins involve braiding the client's natural hair into cornrows and sewing wefts of hair extensions onto the braids using a needle and thread. This method is prevalent for those with thicker, coarser hair types and can last up to 2-3 months.

Micro-links:
Micro-link extensions, also called micro-bead or I-tip extensions, involve attaching individual strands of Remy hair extensions to the client's natural hair using small metal beads or links. This method is popular because it allows for greater freedom of movement and a more natural appearance. Micro-links typically last for 3-4 months with proper maintenance.
Fusion or Keratin-bond:
Fusion extensions involve attaching individual strands of hair extensions to the client's natural hair using a keratin-based adhesive and a heated tool. This method is known for its durability, lasting up to 4-6 months, but it can be more time-consuming to apply and may cause more stress on the client's natural hair.
Proper installation and care of human hair extensions play a crucial role in ensuring client satisfaction and encouraging repeat business. As a hairstylist, adhering to best practices and educating your clients on how to maintain their extensions can make all the difference in the overall experience and longevity of the extensions.
Choosing the Right Hair Extensions for Your Clients

Determining their Hair Type
Assessing a client's own hair type is crucial in determining the best extension type for their unique needs. Considering factors such as thickness, texture, and natural curl pattern will help ensure a seamless blend and a comfortable, long-lasting result. Here's how to assess these factors and match them with the appropriate extension type:
Thickness:
Assess the overall density of your client's own hair by observing the number of individual strands and how they are distributed across the scalp. Clients with fine hair may benefit more from tape in extensions or micro-link extensions, as these methods provide a lightweight and less detectable option. For clients with thicker hair, sew-in extensions or fusion extensions may be more suitable, as they can provide additional support and blend well with the natural density.
Texture:
Examine the client's hair texture, which can range from straight to wavy, curly, or coily. Matching the extension's texture to the client's natural hair is essential to ensure a seamless blend. For example, straight or slightly wavy hair would pair well with tape in or micro-link extensions, while curly or coily hair may benefit more from sew-in extensions or fusion extensions, which can better accommodate the hair's natural texture.
Natural curl pattern:
Observe the client's natural curl pattern and determine how tight or loose the curls are. This will help you select extensions with a similar curl pattern for a flawless result. For example, clients with loose waves or curls may be better suited for wavy tape in or micro-link extensions, while clients with tight curls or coils might find sew-in or fusion extensions more appropriate.
Additional factors:
Along with thickness, texture, and curl pattern, consider the client's lifestyle, styling preferences, and the desired longevity of the extensions. For example, clients who prefer low-maintenance options or want to experiment with different looks might prefer clip-in hair extensions, while those seeking a longer-lasting solution might opt for tape-ins, micro-links, or fusion extensions.
Selecting the Right Hair
Selecting the right length, color, and texture for hair extensions is crucial for achieving a seamless blend with the client's natural hair. Paying close attention to these aspects ensures a professional and natural-looking result that will satisfy clients with their new look. Here's why each of these factors is essential:
Length:
Choosing the appropriate length for hair extensions is important for creating a harmonious and balanced appearance. Extensions that are too long or too short compared to the client's natural hair may look unnatural and be more challenging to blend. Ideally, extensions should complement the client's existing hair length, enhancing the overall look while maintaining a realistic appearance. Discuss the desired outcome with your client and choose a length that aligns with their preferences and suits their face shape and features.

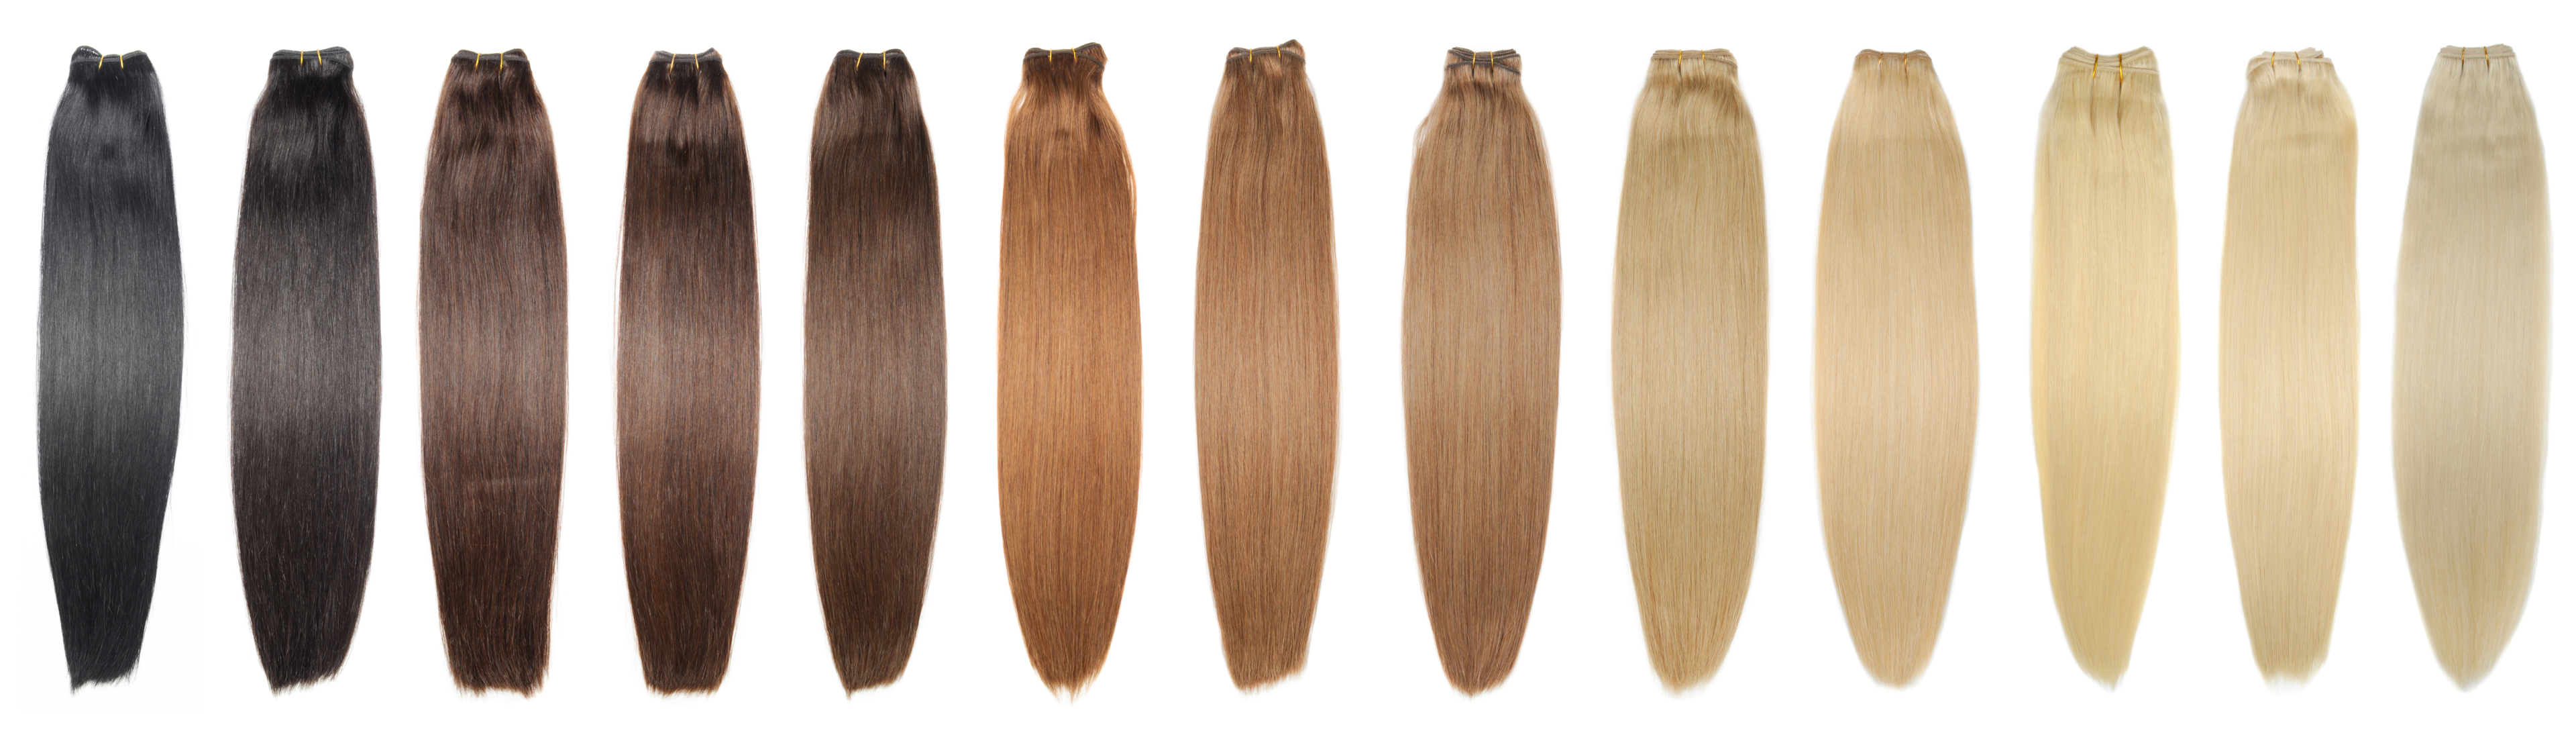
Color:
Selecting the right color for hair extensions is vital for a flawless blend. Extensions should closely match the client's natural hair color, taking into account any highlights, lowlights, or color variations. In some cases, using multiple shades can create a more natural-looking result, particularly for clients with highlights or balayage. Remember that hair extensions can also be colored or toned to achieve the perfect color match, but always consult the extension supplier for recommendations and guidelines before altering the hair.
Texture:
Matching the texture of the extensions to the client's natural hair is essential for seamless integration. Extensions that differ significantly in texture from the client's hair may be more noticeable and harder to blend, resulting in an unnatural appearance. Assess the client's hair texture and choose extensions that best replicate their natural characteristics, whether straight, wavy, curly, or coily. This will ensure the extensions blend effortlessly with the client's hair and create a cohesive and polished look.
Selecting the Installment Method
Comparing the pros and cons of various extension types from a stylist's perspective can help you decide which options to offer and master based on factors such as installation time, required expertise, and client satisfaction. Here's a comparison of some popular extension types:
-
Clip in Hair Extensions: Pros:
-
Quick and easy installation and removal, requiring minimal time and effort
-
No need for professional expertise, as clients can apply and remove them at home
-
Temporary solution, allowing clients to experiment with different looks without commitment Cons:
-
They are less durable compared to other extension types, as they need to be removed before sleeping or engaging in water-based activities
-
It may not be suitable for clients with very fine or thin hair, as clips can be visible
-
-
Tape-in Extensions: Pros:
-
Faster installation time compared to other semi-permanent methods
-
They are lightweight and discreet, making them suitable for clients with fine hair
-
Minimal damage to natural hair, as there is no heat or chemicals involved in the installation process Cons:
-
It may require additional training or certification for stylists to master the technique
-
Clients may experience discomfort or irritation from the adhesive tape
-
Limitations in styling options, as the tape can be visible if not placed correctly
-
-
Sew-in Extensions (Weave): Pros:
-
Durable and long-lasting, with a natural appearance
-
Suitable for clients with thicker, coarser hair types
-
No adhesive, heat, or chemicals are involved, reducing the risk of damage to natural hair Cons:
-
Longer installation time compared to other methods
-
Requires specific expertise in braiding and sewing techniques
-
It may cause tension or discomfort for the client if installed too tightly
-
-
Micro-link Extensions (Micro-bead or I-tip): Pros:
-
It provides a natural look and greater freedom of movement due to individual strand application
-
No adhesive, heat, or chemicals are involved, reducing the risk of damage to natural hair
-
Can be adjusted or repositioned during maintenance appointments Cons:
-
Lengthy installation time, as each strand must be applied individually
-
Requires specialized tools and expertise to install and maintain
-
It may cause discomfort or damage if beads are not correctly installed or tightened
-
-
Fusion or Keratin-bond Extensions: Pros:
-
Long-lasting and durable, with individual strand application for a natural appearance
-
Suitable for various hair types, including fine or thin hair
-
Can be styled and colored like natural hair, offering clients versatility Cons:
-
Time-consuming installation process due to individual strand application
-
It involves heat and chemicals, which can cause damage to natural hair if not applied correctly
-
It may require additional training or certification for stylists to master the technique
-

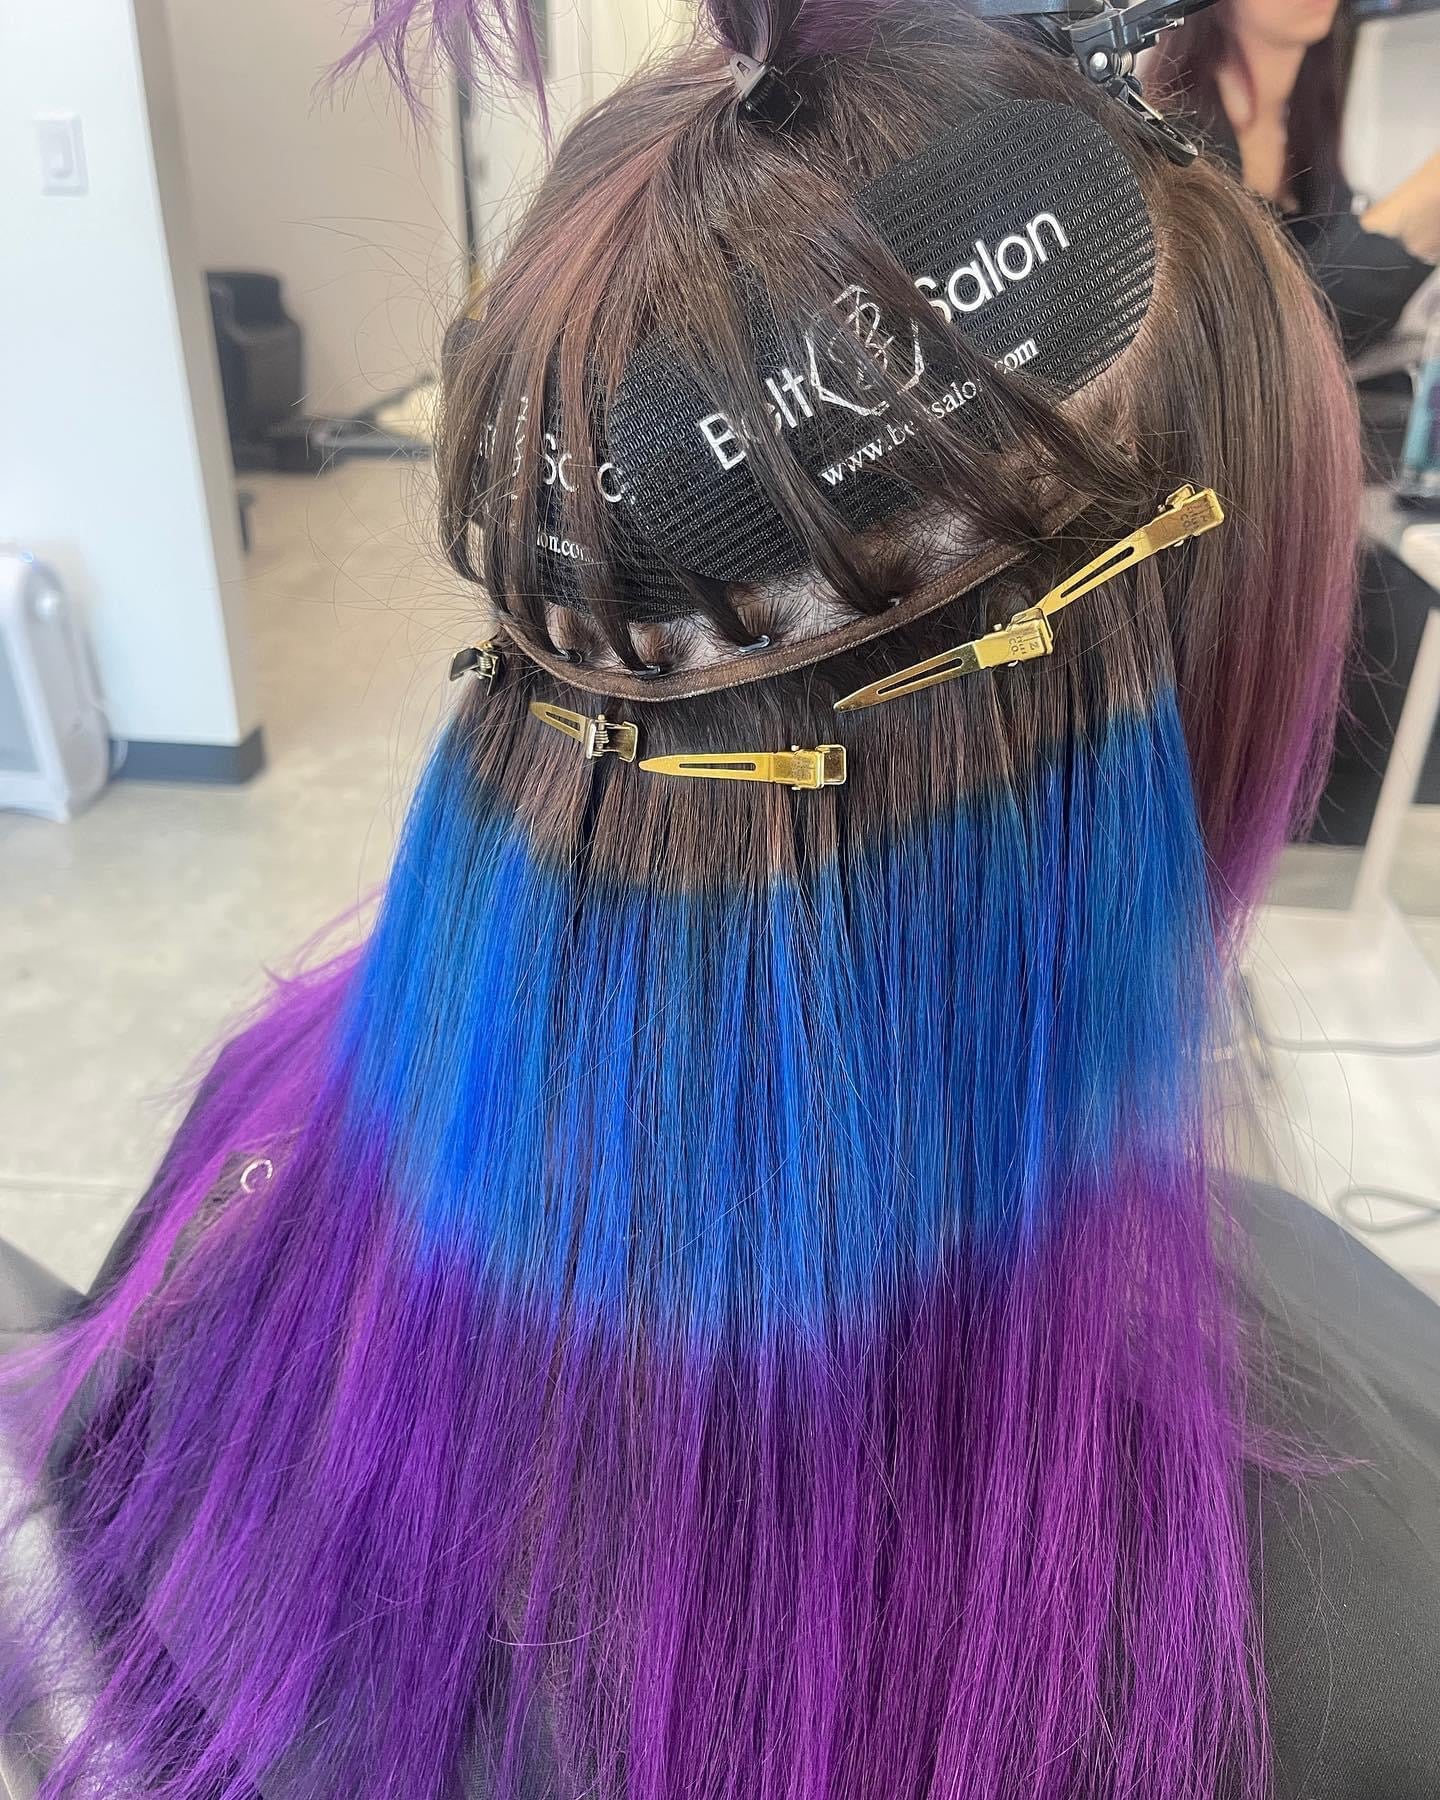
Finding a reliable Supplier
Finding a reliable human hair extension supplier is crucial for offering your clients high-quality products and receiving ongoing support as a stylist. Here are some tips for finding a trustworthy supplier, along with a recommendation for Belt Hair Extensions:
Research and reviews:
Start by researching various suppliers online and paying close attention to customer reviews and testimonials. Look for companies with a solid reputation and positive feedback from other stylists and clients. Check for mentions of product quality, customer service, and overall satisfaction.
Quality of products:
High-quality human hair extensions are essential for providing professional and lasting results for your clients. Look for suppliers that offer 100% Remy hair, known for its natural appearance, durability, and ease of styling. Ensure that the supplier provides a range of lengths, colors, and textures to cater to your diverse clientele. You must ensure that you are not buying synthetic hair extensions. Synthetic hair extensions are inferior and will not give your client a good end result.
Education and training:
A good supplier should offer educational resources and training opportunities for stylists. This can include online tutorials, workshops, or certification programs that will help you master the installation and maintenance of their products. Ongoing support and education are essential for staying up-to-date on the latest techniques and trends in the industry.
Customer service and support:
Choose a supplier that provides excellent customer service and support, including prompt responses to inquiries, assistance with product selection, and guidance on installation techniques. A reliable supplier should be readily available to address any questions or concerns you may have about their products or services.
Warranty and return policy:
A trustworthy supplier should stand by their products with a fair return policy. This ensures that you can confidently offer their extensions to your clients, knowing that any potential issues will be addressed promptly and professionally.
Belt Hair Extensions is a reputable supplier that meets these criteria, offering high-quality products, educational resources, and exceptional customer service. They provide a range of 100% Remy hair extensions in various lengths, and colors, ensuring you can find the perfect match for your client's needs. With ongoing support and training opportunities, Belt Hair Extensions is an excellent choice for stylists looking to expand their services and enhance their expertise in Remy hair extensions.

Essential Tools and Techniques for Hair Extension Installation
-
Clip in Extensions:
-
Clips (pre-attached to the extensions)
-
Tail comb
-
Hair clips or sectioning clips
-
Scissors (for trimming or blending, if necessary)
-
Flat iron or curling iron (for styling and blending, if needed)
-
-
Tape-in Extensions:
-
Tape-in hair extensions (with a pre-taped adhesive)
-
Tail comb
-
Hair clips or sectioning clips
-
Scissors (for trimming or blending, if necessary)
-
Flat iron or curling iron (for styling and blending, if needed)
-
Adhesive remover (for maintenance or removal)
-
-
Sew-in Extensions (Weave):
-
Wefted hair extensions
-
Tail comb
-
Hair clips or sectioning clips
-
Scissors (for trimming or blending, if necessary)
-
Curved weaving needle
-
Weaving thread
-
Sectioning grippers
-
Flat iron or curling iron (for styling and blending, if needed)
-
-
Micro-link Extensions (Micro-bead or I-tip):
-
I-tip hair extensions
-
Micro-beads or micro-links (matching the client's hair color)
-
Tail comb
-
Hair clips or sectioning clips
-
Micro-link application pliers (for applying and removing links)
-
Micro-link loop tool (for threading the client's hair through the beads)
-
Scissors (for trimming or blending, if necessary)
-
Flat iron or curling iron (for styling and blending, if needed)
-
-
Fusion or Keratin-bond Extensions:
-
U-tip or V-tip hair extensions (with pre-bonded keratin tips)
-
Tail comb
-
Hair clips or sectioning clips
-
Scissors (for trimming or blending, if necessary)
-
Fusion heat connector (for melting the keratin bonds)
-
Fusion shields or finger protectors (to protect the client's scalp and your fingers from the heat)
-
Keratin bond remover (for maintenance or removal)
-
Flat iron or curling iron (for styling and blending, if needed)
-
Having the necessary tools and supplies on hand for each installation method will help ensure a smooth and efficient process, resulting in a professional and satisfying outcome for your clients.

The Importance of Hair Condition Before the Installation
Clean, well-conditioned hair is essential for optimal extension adherence and longevity for several reasons. Ensuring the client's hair is in good condition before installing extensions contributes to the overall success of the installation, the appearance of the extensions, and the health of the natural hair. Here's why clean, well-conditioned hair is crucial:
-
Better adherence:
When the hair is clean and free of oils, dirt, and product buildup, the adhesive used in various extension methods, such as tape-ins or fusion extensions, can bond more effectively. A secure bond is critical for the extensions to stay in place, reducing the likelihood of slippage or premature loosening.
2. Improved longevity:
Well-conditioned hair is less prone to tangling, breakage, and other forms of damage. When the client's natural hair is healthy and well-maintained, it can better support the extensions and contribute to their overall longevity. This results in longer-lasting installations and a better experience for your clients.
3. Easier installation:
Clean and well-conditioned hair is easier to work with during the installation process. It is more manageable and less likely to tangle, making the process smoother and more efficient. This ultimately leads to better results and a more enjoyable experience for the stylist and the client.
4. Seamless blend:
When the client's hair is in good condition, it's easier to achieve a seamless blend between the natural hair and the extensions. Healthy, well-conditioned hair will better match the texture and appearance of the extensions, creating a more natural and polished look.
5. Prevention of damage:
Ensuring the client's hair is clean and well-conditioned before installing extensions helps minimize the risk of damage to the natural hair. Healthy hair is more resilient and better equipped to handle the weight and stress of extensions, reducing the likelihood of breakage, thinning, or other issues.
Clean, well-conditioned hair is vital for optimal extension adherence, longevity, and appearance. By appropriately preparing the client's hair, stylists can ensure a smoother installation process, better results, and increased client satisfaction.
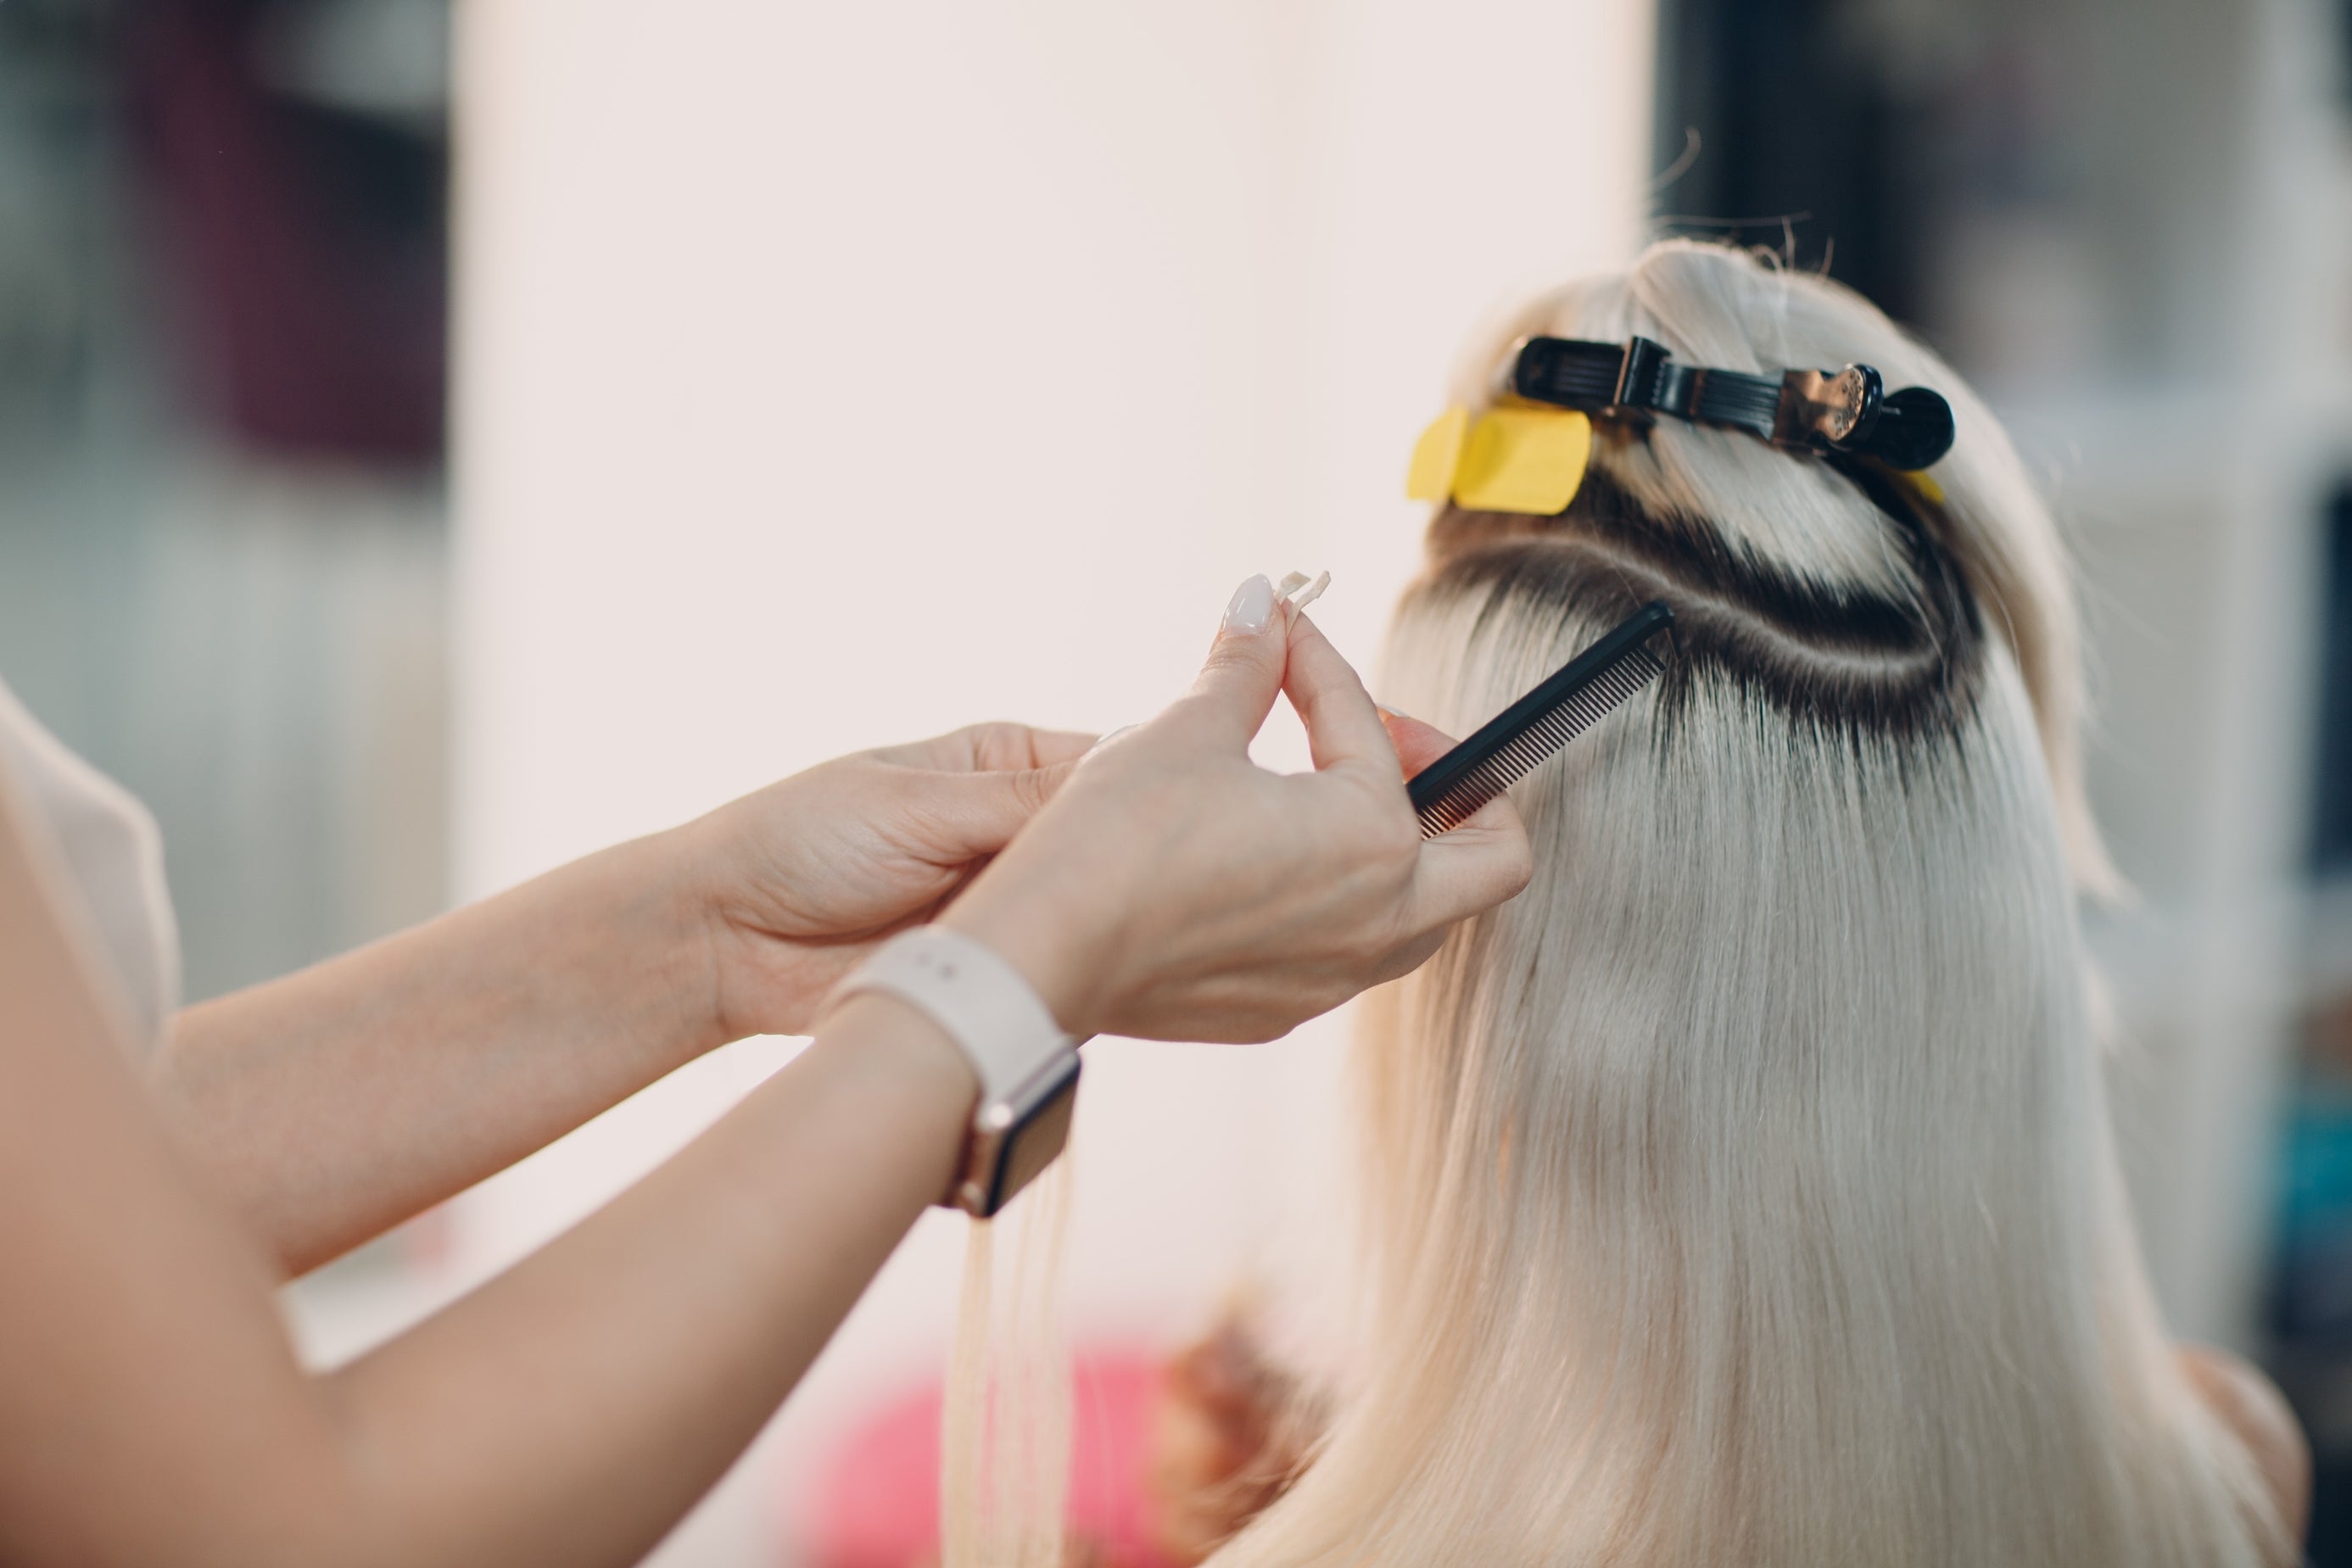
Sectioning Hair
Sectioning hair properly and creating a stable base for extensions are crucial steps for ensuring they stay secure, lie flat, and provide a natural appearance. Here are some tips for achieving this:
Create a clean, horizontal part:
Begin by using a tail comb to create a clean, horizontal part across the back of the head, just above the nape of the neck. This will be your starting point for installing the extensions. Use hair clips to secure the hair above the parting, keeping it out of the way.
Leave a perimeter:
When creating the initial part, ensure a perimeter of natural hair around the hairline and on the sides of the head. This will help conceal the extensions and create a more natural appearance. The perimeter should be wide enough to cover the extensions when the hair is worn up or pulled back.
Work in small sections:
Working in small sections will help ensure a more stable base and make it easier to install the extensions. Create clean, even rows when applying for the extensions, and use hair clips to keep the unworked hair out of the way.
Maintain even tension:
When installing extensions, make sure to maintain even tension along the base. This will help ensure the extensions lie flat and stay secure. Avoid pulling the hair too tightly, as this can cause discomfort for the client and lead to tension headaches or hair breakage.
Ensure proper spacing:
To create a stable base, space the extensions evenly and avoid placing them too close to the hairline or partings. This will help prevent excessive tension on the client's natural hair and reduce the risk of damage.
Cross-check for consistency:
As you progress with the installation, occasionally cross-check your work to ensure consistency in the spacing, tension, and placement of the extensions. This will help create a stable and even base for the extensions.
Customize the base for different extension types:
Different extension types require slightly different bases. For example, micro-link extensions need a clean parting and evenly spaced sections. Be sure to adapt your sectioning and base creation techniques according to your specific method.

Step By Step Guide to Installing Hair Extensions
Clip in Extensions:
Step 1: Preparation
1.1. Wash, dry, and style your client's hair as desired, ensuring it is free of tangles.
1.2. Lay out the clip-in hair extensions, comb, and other tools.
Step 2: Sectioning your client's hair
2.1. Use the rat-tail comb to create a horizontal part across the back of your client's head, about an inch above the nape of their neck. Clip the rest of the hair up and out of the way.
2.2. Measure the width of the hair section to determine which clip-in extension wefts will fit best in the area.
Step 3: Installing the clip-in extensions
3.1. Select the appropriate clip-in extension weft and open all the clips by gently pressing on both sides.
3.2. Align the top edge of the weft with the part, making sure the clips are facing your client's scalp.
3.3. Attach the clips to your client's natural hair, starting from the center and working your way out to the sides. Press down firmly on each clip to secure it in place.
Step 4: Creating additional rows
4.1. Release the clipped hair and create another horizontal part about an inch above the first row of extensions.
4.2. Repeat Steps 3 to install more clip-in extensions, selecting the appropriate wefts to match the width of each section.
4.3. Continue adding rows, leaving about an inch between each row, until you reach the desired level of coverage. Make sure to leave enough natural hair on the top layer to cover the clips.
Step 5: Blending and styling
5.1. After all the extensions have been installed, unclip the remaining hair and blend it with the extensions using your fingers or a comb.
5.2. Trim the extensions if necessary to blend them seamlessly with your client's natural hair.
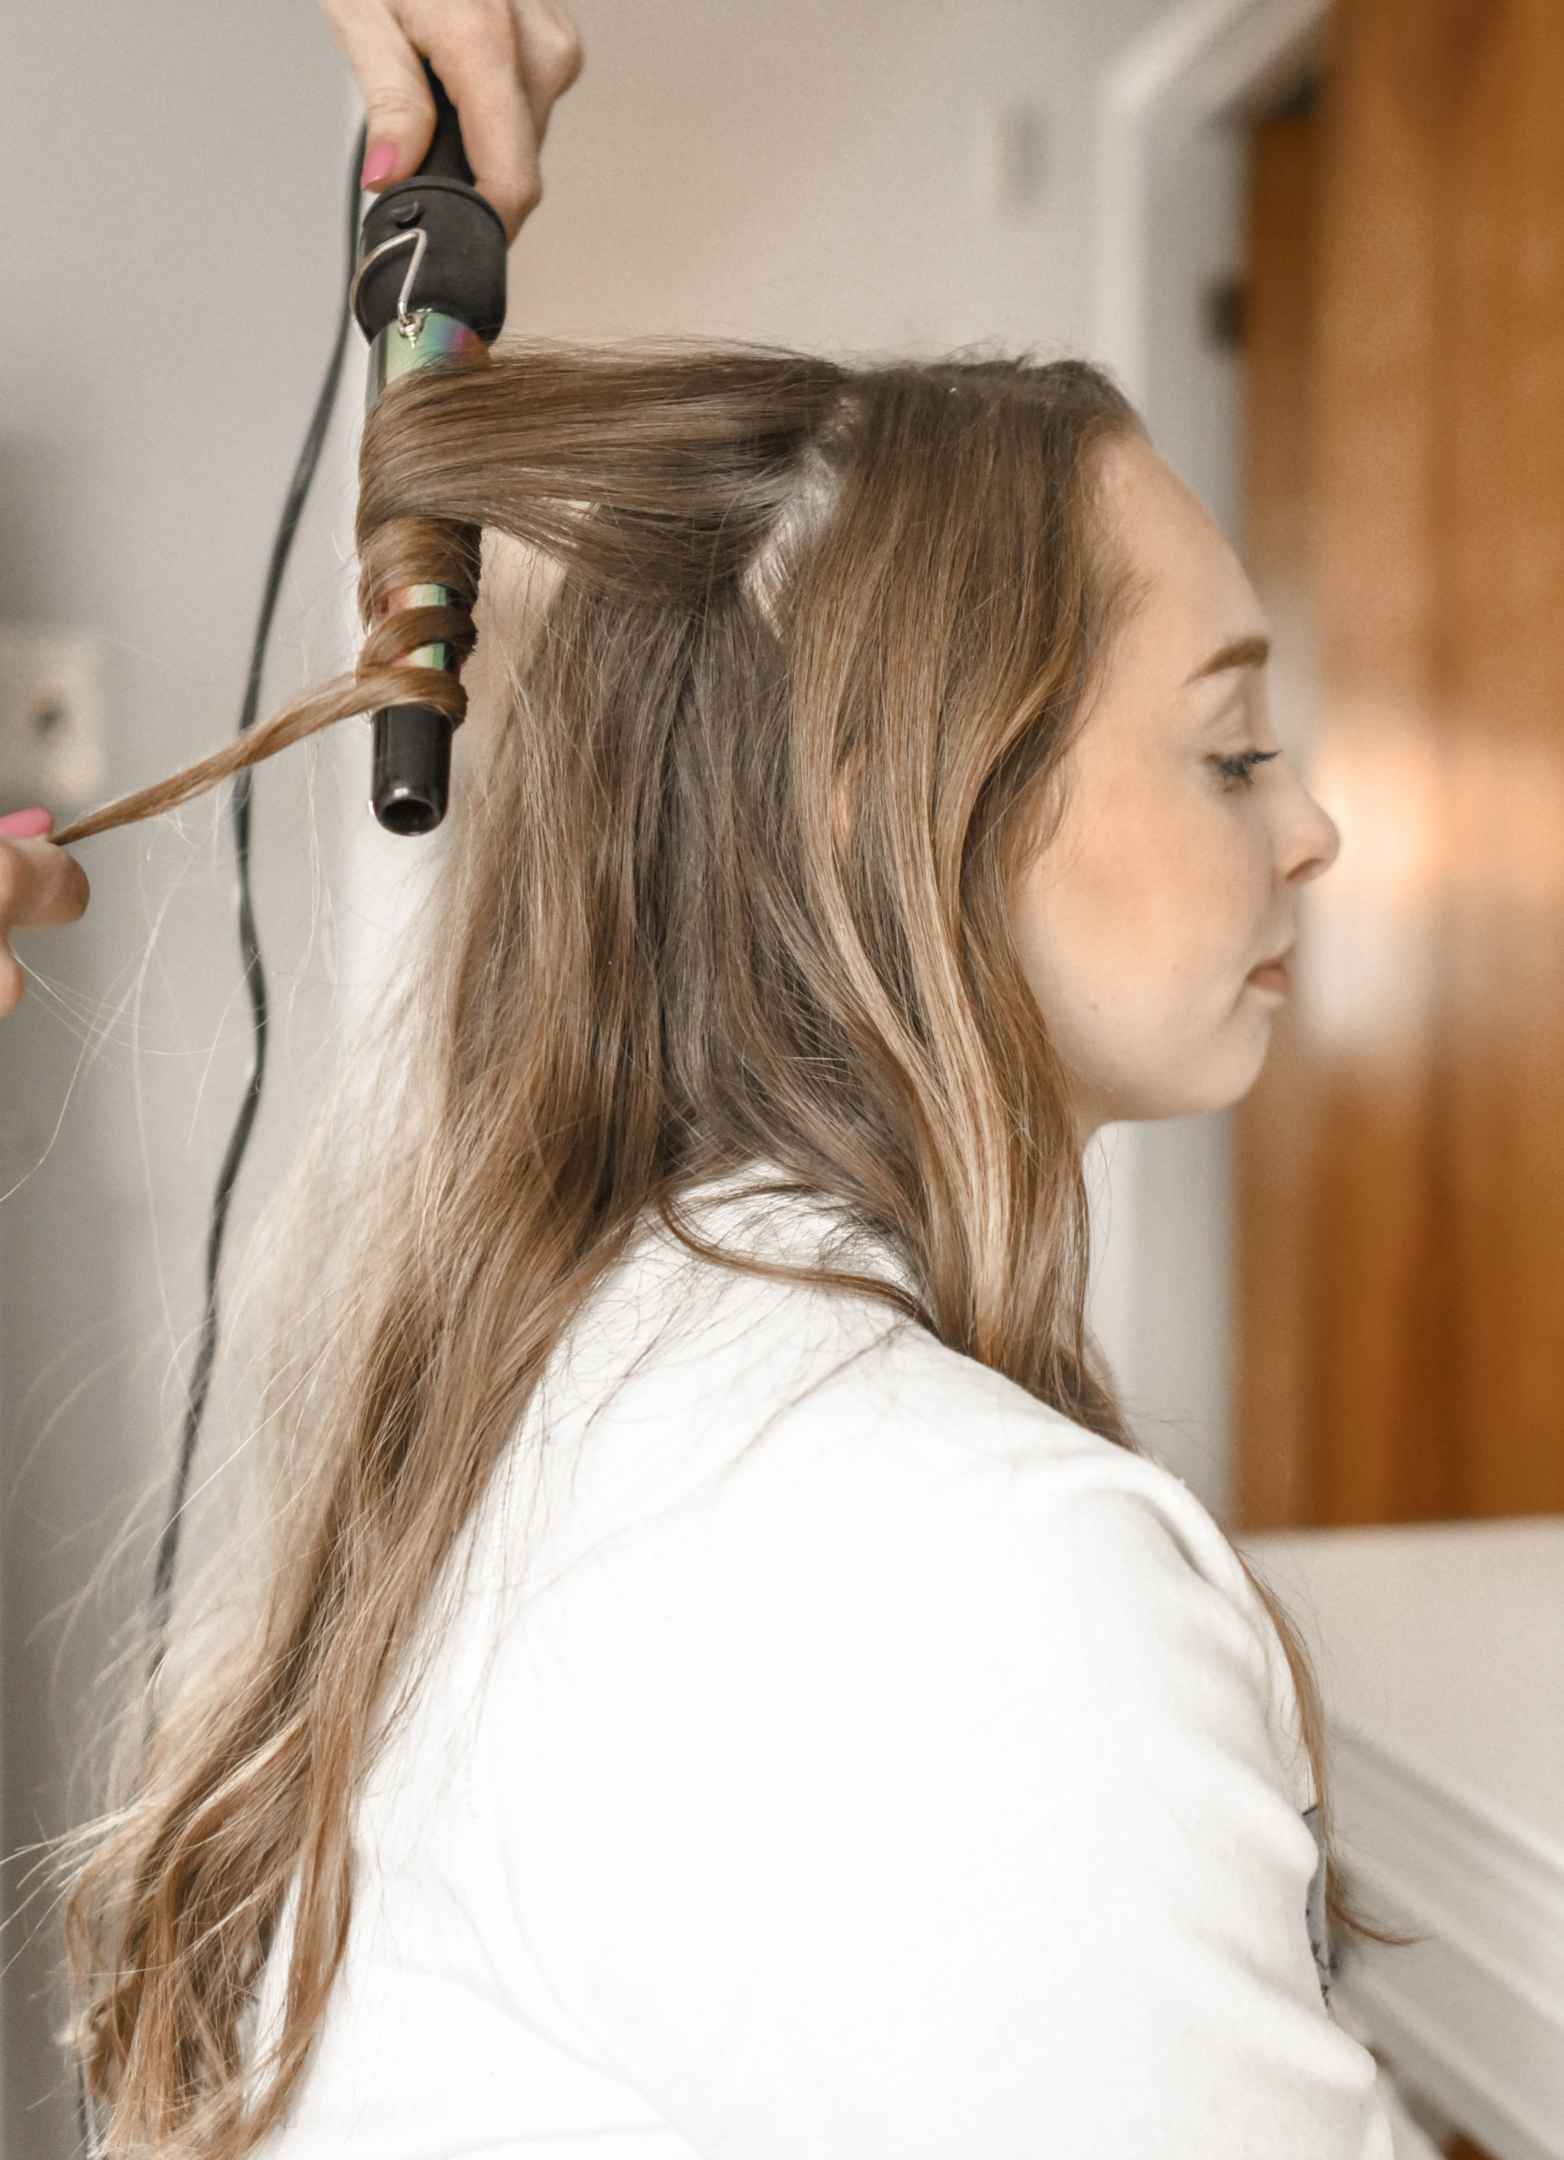
5.3. Style your client's hair as desired, using a flat iron, curling iron, or other styling tools.
Tape-in Extensions:
Step 1: Preparation
1.1. Wash and dry your client's hair thoroughly, avoiding conditioner, as it may affect the adhesion of the tape.
1.2. Lay out the tape-in hair extensions, comb, and other tools.
Step 2: Sectioning your client's hair
2.1. Use the rat-tail comb to create a horizontal part across the back of your client's head, about an inch above the nape of their neck. Clip the rest of the hair up and out of the way.
2.2. Measure the width of the hair section to determine how many tape-in extension pieces you will need.
Step 3: Installing the tape-in extensions
3.1. Take the first tape-in extension and remove the backing to reveal the adhesive.
3.2. Align the extension with the part, making sure the adhesive side is facing your client's scalp, and press it firmly onto their natural hair, about 1/4 inch from the roots.
3.3. Take a second tape-in extension and remove the backing.
3.4. Sandwich your client's natural hair between the two extensions by pressing the adhesive side of the second extension onto the adhesive side of the first extension, with their natural hair in between.
3.5. Press the two extensions together firmly, ensuring a secure bond. You can use a flat iron on low heat to further seal the bond, but avoid direct contact with the adhesive tape.
Step 4: Creating additional rows
4.1. Release the clipped hair and create another horizontal part about an inch above the first row of extensions.
4.2. Repeat Steps 3 to install more tape-in extensions.
4.3. Continue adding rows, leaving about an inch between each row, until you reach the desired level of coverage. Make sure to leave enough natural hair on the top layer to cover the tape.
Step 5: Blending and styling
5.1. After all the extensions have been installed, unclip the remaining hair and blend it with the extensions using your fingers or a comb.
5.2. Trim the extensions if necessary to blend them seamlessly with your client's natural hair.
5.3. Style your client's hair as desired, using a flat iron, curling iron, or other styling tools.
Sew-in Extensions:
Step 1: Preparation
1.1. Wash and dry your client's hair thoroughly, avoiding conditioner, as it may affect the bead's grip.
1.2. Lay out the hand-tied hair extensions, comb, and other tools.
Step 2: Sectioning your client's hair
2.1. Use the rat-tail comb to create a horizontal part across the back of your client's head, about an inch above the nape of their neck. Clip the rest of the hair up and out of the way.
2.2. Measure the width of the hair section to determine the number of extension wefts required.
Step 3: Installing the anchor beads
3.1. Take the loop tool or bead loader and insert a micro-bead or silicone-lined bead.
3.2. Pick a small section of your client's hair near the parting, slide the bead onto the loop tool or bead loader, and pull the hair through the bead.
3.3. Move the bead up the hair strand, positioning it about 1/4 inch from the roots.
3.4. Use the pliers to clamp the bead securely in place.
3.5. Repeat this process along the parting, spacing beads about 1 inch apart.
Step 4: Sewing in the hand-tied wefts
4.1. Thread the needle with a length of nylon or cotton thread, and tie a knot at the end.
4.2. Align the hand-tied weft with the row of beads, ensuring the weft's edge is flush against the beads.
4.3. Insert the needle through the weft and the bead loop, pulling the thread tight.
4.4. Repeat the stitching process along the entire row, ensuring each weft edge is securely attached to the beads.
4.5. When you reach the end of the row, double-knot the thread to secure it and trim any excess.
Step 5: Creating additional rows
5.1. Release the clipped hair and create another horizontal part about an inch above the first row of extensions.
5.2. Repeat Steps 3 and 4 to install more hand-tied hair extensions.
5.3. Continue adding rows, leaving about an inch between each row, until you reach the desired level of coverage. Make sure to leave enough natural hair on the top layer to cover the wefts.
Step 6: Blending and styling
6.1. After all the extensions have been installed, unclip the remaining hair and blend it with the extensions using your fingers or a comb.
6.2. Trim the extensions if necessary to blend them seamlessly with your client's natural hair.
6.3. Style your client's hair as desired, using a flat iron, curling iron, or other styling tools.
Fusion or Keratin-bond Extensions:
Step 1: Preparation
1.1. Wash and dry your hair thoroughly, avoiding conditioner, as it may affect the bond of the keratin adhesive.
1.2. Lay out your keratin hair extensions, comb, fusion heat connector, and other tools.
Step 2: Sectioning your hair
2.1. Use the rat-tail comb to create a horizontal part across the back of your head, about an inch above the nape of your neck. Clip the rest of your hair up and out of the way.
2.2. Separate a thin layer of hair from the sectioned area, ensuring it is no thicker than the hair extension strand.
Step 3: Installing the keratin hair extensions
3.1. Place a protective shield disc or heat protector pad under the section of your natural hair to prevent burns during the application.
3.2. Grab a keratin hair extension strand and align the keratin tip with the roots of the natural hair section.
3.3. Use the fusion heat connector to gently heat the keratin tip until it softens and becomes transparent.
3.4. Quickly roll the softened keratin tip between your fingers to create a secure bond with your natural hair. Be careful not to burn your fingers.
3.5. Use hair extension pliers to press the bonded area gently, ensuring a secure and smooth connection.
Step 4: Creating additional rows
4.1. Continue attaching keratin hair extensions to the rest of the hair in the sectioned area, spacing them about 1/2 inch apart.
4.2. Release the clipped hair and create another horizontal part about an inch above the first row of extensions.
4.3. Repeat Steps 2 and 3 to install more keratin hair extensions.
4.4. Continue adding rows, leaving about an inch between each row, until you reach the desired level of coverage. Make sure to leave enough natural hair on the top layer to cover the bonds.
Step 5: Blending and styling
5.1. After all the extensions have been installed, unclip the remaining hair and blend it with the extensions using your fingers or a comb.
5.2. Trim the extensions if necessary to blend them seamlessly with your natural hair.
5.3. Style your hair as desired using a flat iron, curling iron, or other styling tools.
Micro Link
Step 1: Preparation
1.1. Wash and dry your client's hair thoroughly, avoiding conditioner, as it may affect the bead's grip.
1.2. Lay out the hand-tied hair extensions, comb, and other tools.
Step 2: Sectioning your client's hair
2.1. Use the rat-tail comb to create a horizontal part across the back of your client's head, about an inch above the nape of their neck. Clip the rest of the hair up and out of the way.
2.2. Measure the width of the hair section to determine the number of extension wefts required.
Step 3: Installing the anchor beads
3.1. Take the loop tool or bead loader and insert a micro-bead or silicone-lined bead.
3.2. Pick a small section of your client's hair near the parting, slide the bead onto the loop tool or bead loader, and pull the hair through the bead.
3.3. Move the bead up the hair strand, positioning it about 1/4 inch from the roots.
3.4. Use the pliers to clamp the bead securely in place.
3.5. Repeat this process along the parting, spacing beads about 1 inch apart.
Step 4: Sewing in the hand-tied wefts
4.1. Thread the needle with a length of nylon or cotton thread, and tie a knot at the end.
4.2. Align the hand-tied weft with the row of beads, ensuring the weft's edge is flush against the beads.
4.3. Insert the needle through the weft and the bead loop, pulling the thread tight.
4.4. Repeat the stitching process along the entire row, ensuring each weft edge is securely attached to the beads.
4.5. When you reach the end of the row, double-knot the thread to secure it and trim any excess.
Step 5: Creating additional rows
5.1. Release the clipped hair and create another horizontal part about an inch above the first row of extensions.
5.2. Repeat Steps 3 and 4 to install more hand-tied hair extensions.
5.3. Continue adding rows, leaving about an inch between each row, until you reach the desired level of coverage. Make sure to leave enough natural hair on the top layer to cover the wefts.
Step 6: Blending and styling
6.1. After all the extensions have been installed, unclip the remaining hair and blend it with the extensions using your fingers or a comb.
6.2. Trim the extensions if necessary to blend them seamlessly with your client's natural hair.
6.3. Style your client's hair as desired, using a flat iron, curling iron, or other styling tools.
-
For all extension types, keep the following tips in mind:
-
Consultation is vital: Assess the client's hair type, desired look, and lifestyle before selecting the best extension method.
-
Customization: Always tailor the installation to the individual client, considering their specific needs and preferences.
-
Maintenance Education: Educate clients on proper extension care, including washing, brushing, and using appropriate hair products.
-
Follow-up appointments: Encourage clients to schedule follow-up appointments for maintenance or adjustments, ensuring the extensions remain in good condition and the client's natural hair stays healthy.
-
Ongoing education: Continually update your skills and knowledge to stay current on the latest extension techniques and products, enabling you to provide the best possible service to your clients.

-
Educating Clients on Hair Extension Care
Educating clients on how to care for their hair extensions properly is essential for maintaining their appearance and durability. Following are some essential tips to share with clients for cleaning, conditioning, and styling their extensions:
Cleaning:
-
Shampoo: Advise clients to use sulfate-free and alcohol-free shampoos to prevent drying out the extensions. Recommend washing their hair every 2-3 days or as needed, depending on their hair type and extension method. They should gently massage the shampoo into their scalp and work it down through the extensions, avoiding vigorous rubbing or tangling.
-
Rinsing: Clients should thoroughly rinse their hair and extensions with lukewarm water to remove all traces of shampoo.
Conditioning:
-
Conditioner: Recommend using a lightweight, hydrating conditioner suitable for extensions. Clients should apply it from the mid-lengths to the ends of the hair, avoiding the roots and bonds (for fusion, keratin-bond, tape-in, or micro-link extensions) to prevent loosening or weakening the attachments.
-
Deep conditioning: Suggest occasional deep conditioning treatments to keep extensions nourished and soft. Clients should follow the same application guidelines as regular conditioners, focusing on the mid-lengths and ends.
-
Rinsing: Clients should rinse the conditioner thoroughly with cool water to seal the hair cuticles and add shine.
Drying:
-
Towel-drying: Instruct clients to gently squeeze excess water from their hair and extensions with a microfiber towel or a soft cotton T-shirt. They should avoid rubbing or twisting the hair, which can cause tangles and damage.
-
Air-drying: Whenever possible, encourage clients to let their hair and extensions air-dry. This will help minimize heat damage and prolong the life of the extensions.
Styling:
-
Detangling: Clients should use a wide-tooth comb or a brush specifically designed for extensions to gently detangle their hair, starting at the ends and working up to the roots.
-
Heat styling: While it is best to minimize heat styling, clients should use a heat protectant spray when using hot tools like flat irons, curling wands, or blow dryers. They should also avoid excessive heat near the bonds or attachment points of the extensions.
-
Protective hairstyles: Recommend clients wear their hair in loose braids or a silk scarf at night to prevent tangles and friction damage.
-
Maintenance appointments: Encourage clients to schedule regular maintenance appointments to check the extension attachments, make any necessary adjustments, and trim their natural hair.
Preventing tangling and shedding is crucial for maintaining the appearance and longevity of hair extensions. As a hairstylist, it is essential to relay this information to clients to ensure they get the most out of their extensions. Here are some valuable tips to share with your clients:
-
Brush gently: Encourage clients to gently brush their hair and extensions at least twice a day using a wide-tooth comb or a brush specifically designed for extensions. They should start at the ends and work up to the roots, careful not to pull on the bonds or attachment points.
-
Avoid rough handling: Instruct clients to handle their hair and extensions carefully, avoiding vigorous rubbing or twisting when washing, towel-drying, or styling.
-
Minimize heat styling: While occasional heat styling is acceptable, excessive use of hot tools can weaken the hair and cause tangling or shedding. Recommend clients use a heat protectant spray and lower heat settings when styling their hair.
-
Sleep smart: Advise clients to wear their hair in a loose braid or bun and use a silk or satin pillowcase to minimize friction and tangling while sleeping.
-
Keep hair moisturized: Suggest clients use hydrating, lightweight products like leave-in conditioners or hair oils to keep their extensions and natural hair moisturized, which helps prevent tangling.
-
Avoid harsh chemicals: Inform clients to steer clear of harsh chemicals, such as chlorine or saltwater, which can damage extensions and cause tangling or shedding. If swimming is unavoidable, they should wear a swim cap or rinse their hair immediately afterward.
-
Regular maintenance: Encourage clients to schedule regular appointments to maintain their extensions, as this will help prevent tangling and shedding by keeping the attachment points secure and the hair in optimal condition.
The appropriate time frame for clients to return for extension removal or replacement varies depending on the type and quality of the product. Here is a general guideline for different types of hair extensions:
-
Clip in Hair Extensions: Clip-in extensions are temporary and designed to be removed at the end of the day. Clients should be advised to remove and store them properly to maintain their quality and lifespan. With proper care, high-quality clip in hair extensions can last for several months or even a year.
-
Tape-in Extensions: Tape-in extensions typically need to be removed or adjusted every 6-8 weeks, depending on the client's hair growth and product quality. During the maintenance appointment, the stylist can reapply the extensions using new adhesive tapes if the hair is still in good condition.
-
Sew-in Extensions (Weave): Sew-in extensions generally need to be removed or replaced every 6-8 weeks. This time frame allows the client's natural hair to be washed, conditioned, and assessed for damage or breakage. It also prevents matting and tangling at the base of the cornrows.
-
Micro-link Extensions (Micro-bead or I-tip): Micro-link extensions should be adjusted every 6-10 weeks, depending on the client's hair growth and product quality. During maintenance appointments, the stylist can move the beads closer to the scalp to accommodate hair growth and re-tighten the beads if necessary.
-
Fusion or Keratin-bond Extensions: Fusion or keratin-bond extensions generally last between 3-5 months, depending on the client's hair growth, the quality of the product, and proper maintenance. The stylist may need to remove and replace any damaged or loose bonds during maintenance appointments. It is essential to assess the client's natural hair condition before reapplying for the extensions to prevent damage or breakage.
It's important to note that these time frames are general guidelines, and individual clients may require more frequent or less frequent maintenance appointments based on their hair type, growth rate, and lifestyle. As a stylist, it is essential to communicate the importance of regular maintenance appointments to clients, as this will help ensure the longevity of the extensions and maintain the health of their natural hair.
-
Building Your Hair Extension Business
The importance of marketing your new hair extension service cannot be overstated, as it plays a crucial role in attracting new clients and expanding your business. Showcasing your expertise and highlighting the benefits of real human hair extensions can help create interest and generate demand for your services. Here are some marketing strategies to consider when promoting your hair extension service:
-
Before and after photos: One of the most effective ways to showcase your work is by displaying before and after photos of clients who have received hair extension services. These visual examples allow potential clients to see the transformative results and help them envision the possibilities for their own hair. Be sure to obtain permission from your clients before using their photos for marketing purposes.
-
Offer promotions: Attract new clients and entice existing ones by offering limited-time promotions or discounts on hair extension services. For example, you could offer a complimentary consultation or a discount on the first installation to new clients. Promotions can also be tied to special events, holidays, or seasonal changes.
-
Utilize social media: Social media platforms such as Instagram, Facebook, and Pinterest are potent tools for showcasing your work and connecting with potential clients. Share photos, videos, and testimonials of your hair extension services, and engage with your audience through comments, direct messages, and stories. Utilize hashtags relevant to hair extensions and your local area to increase your visibility.
-
Collaborate with influencers: Partnering with local influencers or bloggers with a significant following can help you reach a broader audience. Offer them hair extension services in exchange for featuring your work on their platforms. This strategy can lead to increased exposure and help build your credibility as an expert in hair extensions.
-
Network with other professionals: Connect with other hairstylists, salon owners, and beauty professionals in your area to create mutually beneficial partnerships. For example, you could offer hair extension services at a local salon or collaborate on a photo shoot with a makeup artist or photographer.
-
Website and online presence: Ensure your website is up-to-date and features information about your hair extension services, including pricing, types of extensions offered, and any special promotions. Optimize your website for search engines by including relevant keywords and phrases related to hair extensions and your location. Additionally, consider creating a blog on your website to share tips, tutorials, and information about hair extensions.
-
Referral program: Encourage satisfied clients to refer friends and family members by offering incentives such as discounts on future services or complimentary products. Word of mouth is a powerful marketing tool, and clients who are happy with their extensions are likely to share their experiences with others.

Attending hair extension workshops or certification programs can be highly beneficial for hairstylists looking to refine their skills and gain credibility in the industry. These educational opportunities offer numerous advantages that can help you grow your business and establish yourself as a trusted expert in hair extensions.
-
Skill Enhancement: Workshops and certification programs provide hands-on training and demonstrations, allowing you to learn and practice new techniques for installing, maintaining, and removing various types of extensions. This will enable you to offer a broader range of services and cater to diverse client needs.
-
Knowledge of Latest Trends and Products: The hair extension industry continuously evolves, with new products and techniques regularly being introduced. Attending workshops and certification programs can keep you informed about the latest trends, ensuring that you stay up-to-date and competitive in the market.
-
Networking Opportunities: Attending industry events allows you to connect with fellow hairstylists, educators, and suppliers who share your passion for hair extensions. These connections can lead to valuable partnerships, referrals, and opportunities for collaboration, helping you grow your business and broaden your reach.
-
Industry Credibility: Obtaining a certification in hair extensions demonstrates your commitment to professionalism and expertise in your field. This can enhance your reputation among clients and peers, instilling trust and confidence in your services.
-
Marketing Advantage: Being certified in hair extension techniques can be a powerful marketing tool, setting you apart from competitors who may not have the same training or credentials. You can showcase your certification on your website, social media profiles, and marketing materials to attract clients seeking a certified hair extension specialist.
-
Continued Education: Many certification programs offer ongoing support and resources, such as access to online forums, educational materials, or exclusive discounts on products and tools. This can help you stay informed about industry developments and continually improve your skills.
-
Increased Earning Potential: By expanding your skillset and offering hair extension services, you can diversify your income sources and increase your overall earning potential. Clients are often willing to pay a premium for expertly installed extensions, particularly if you have a certification to back up your expertise.
Networking with other stylists and extension specialists offers a wealth of benefits, helping you grow professionally and personally. By connecting with like-minded individuals, you can share tips and tricks and stay up-to-date on industry trends. Some of the critical advantages of networking in the hair extension field include the following:
-
Learning from Peers: Engaging with other stylists and extension specialists allows you to learn from their experiences and expertise. This can lead to the discovery of new techniques, products, and best practices, helping you refine your skills and offer the best possible service to your clients.
-
Staying Current on Trends: The hair extension industry is constantly evolving, with new styles, techniques, and products emerging regularly. Networking with others in the field can help you stay informed about the latest trends, ensuring that you remain competitive and knowledgeable.
-
Collaborative Opportunities: Networking can lead to opportunities for collaboration, such as working together on photoshoots, events, or joint marketing efforts. These collaborations can help broaden your portfolio, showcase your skills, and expand your client base.
-
Referral Network: Building relationships with other stylists and extension specialists can lead to a referral network, where you recommend each other's services to clients. This can help grow your business by bringing in new clients who are explicitly seeking hair extension services.
-
Mentorship and Support: Connecting with experienced professionals in the hair extension industry can provide valuable mentorship and support, helping you navigate the challenges and successes of your career. This guidance can be particularly helpful for those just starting in the field or looking to expand their services.
-
Access to Resources: Networking can lead to access to exclusive resources, such as educational materials, product discounts, or invitations to industry events. These resources can help you stay informed, improve your skills, and maintain a competitive edge in the market.
-
Personal and Professional Growth: Networking with others in the hair extension industry can contribute to personal and professional growth. You can develop valuable communication, problem-solving, and relationship-building skills to enhance your career and personal life.
Expert Tips and Tricks for Hair Extension Success
Professional hairstylists and extension specialists have a wealth of knowledge and experience to share regarding hair extensions. Here are some valuable tips, including proper placement techniques and styling hacks, that can help you achieve seamless and beautiful results for your clients:
-
Proper Placement Techniques: a. Avoid placing extensions too close to the hairline or nape of the neck, as this can cause discomfort, visibility, and difficulty styling. b. Place extensions in a brick-lay pattern to ensure even weight distribution and natural-looking volume and movement. c. When installing tape-in extensions, sandwich the client's natural hair between two extension pieces to create a secure bond and minimize damage. d. For micro-link or fusion extensions, maintain a consistent distance from the scalp (approximately 1/4 inch) to allow for comfortable hair growth and movement.
-
Styling Hacks: a. For a seamless blend, customize the extensions by texturizing or layering them to match the client's natural hair. b. Curl or wave both the client's hair and the extensions together to create a cohesive and natural-looking style. c. Use a root touch-up spray or temporary hair color to blend the extension bonds or attachment points with the client's natural hair, especially for clients with thin hair or fine textures. d. Teach clients how to properly use hair accessories, such as headbands, scarves, or hairpins, to create stylish and versatile looks while keeping the extensions secure and discreet.
-
Maintenance and care: a. Instruct clients on proper brushing techniques, such as using a wide-tooth comb or an extension-friendly brush and brushing from ends to roots to prevent tangling or pulling on the attachment points. b. Recommend sulfate-free and extension-safe hair products to clients, as some ingredients in regular hair products can weaken the bonds or cause tangling. c. Encourage clients to sleep with their hair in a loose braid or bun and use a silk or satin pillowcase to minimize friction and tangling.
-
Troubleshooting: a. If a client experiences discomfort or itching, assess the placement and tension of the extensions, and adjust accordingly. b. In the case of shedding, inspect the attachment points for damage or slippage and reinforce or replace the affected extensions as needed.
-
Discuss methods for achieving the most natural look for clients, like using multiple extension colors or customizing the placement for their unique hair type.
-
Suggest creative ways to style hair with extensions, like updos, braids, and curls, to inspire your clients and showcase your skills.

Celebrating Your Hair Extension Transformations
Creating a collection of before and after hair extension transformations can be an excellent way to showcase your expertise and inspire potential clients. By displaying these transformations, you can demonstrate the impact of your work and help clients envision the possibilities for their own hair. Here are some tips on curating a captivating and diverse portfolio:
-
Variety: Include a wide range of hair types, textures, colors, and extension methods in your portfolio to show your versatility and ability to cater to various client needs. This can help potential clients feel confident that you can work with their unique hair characteristics.
-
High-Quality Images: Ensure that you're before and after photos are of high quality and well-lit, with a clean background to keep the focus on the hair. Clear, professional-looking images will convey your attention to detail and dedication to your craft.
-
Consistent Style: Develop a consistent style for your before and after photos to create a cohesive look for your portfolio. This may include using the same background, lighting, or angles for each set of images.
-
Progress Shots: Consider including progress shots during the extension installation process to give potential clients an insight into your techniques and attention to detail.
-
Testimonials: Pair you're before and after images with testimonials from satisfied clients to add credibility and a personal touch to your portfolio. Be sure to obtain permission from your clients before using their photos and testimonials for marketing purposes.
-
Regular Updates: Keep your portfolio up-to-date by adding new transformations regularly. This will demonstrate your ongoing commitment to your work and show potential clients that you consistently deliver exceptional results.
-
Online Presence: Make your before and after collection easily accessible by sharing it on your website, social media profiles, and other online platforms. This will enable potential clients to discover your work and connect with you more easily.
-
Print Portfolio: Consider creating a print version of your before and after collection to display at your salon, studio, or during consultations. This can be a tangible marketing tool and conversation starter with potential clients.
By curating a visually appealing and diverse collection of before and after hair extension transformations, you can effectively showcase your expertise and inspire potential clients to book your services. This portfolio can become an invaluable marketing tool, helping you attract new clients and grow your business.
Encouraging clients to share their positive experiences with friends and family can be an effective way to grow your hair extension business through word-of-mouth marketing. One way to enhance this strategy is by implementing a referral program that rewards both the referring client and the new client for their patronage. Here are some tips on creating a successful referral program:
-
Incentivize Referrals: Offer incentives for referring and referred clients to encourage participation in your referral program. This could include discounts on future services, complimentary treatments, or a points-based reward system.
-
Simplify the Process: Make the referral process as simple as possible for your clients. Provide them with easy-to-share referral cards, codes, or links they can give to their friends and family. Clearly explain the referral program and the rewards they can earn by participating.
-
Promote Your Referral Program: Ensure that your clients are aware of your referral program by promoting it through various channels, such as your website, social media, email newsletters, and in-salon marketing materials. Train your staff to mention the referral program during client interactions and consultations.
-
Track Referrals: Develop a system for tracking and managing referrals, such as using CRM (Customer Relationship Management) software or a spreadsheet. This will help you monitor the effectiveness of your referral program and make adjustments as needed.
-
Express Gratitude: Show appreciation to your clients for their referrals by sending personalized thank-you notes, emails, or messages. This small gesture can make clients feel valued and encourage them to continue referring friends and family.
-
Monitor and Adjust: Regularly assess the performance of your referral program and make adjustments as needed. This could include changing the incentives, simplifying the referral process, or improving the promotion of the program. Be open to feedback from clients and staff to help refine your referral program.
-
Maintain High-Quality Service: Ensure that your hair extension services are consistent with high quality, as client satisfaction is the foundation for successful word-of-mouth marketing. Happy clients are more likely to share their experiences and refer others to your business.
By implementing a well-structured referral program and encouraging clients to share their experiences, you can leverage the power of word-of-mouth marketing to grow your hair extension business. This approach can help you attract new clients, strengthen relationships with existing clients, and increase your overall revenue.
In conclusion, mastering the art of hair extensions is a valuable skill that can significantly expand your offerings as a stylist and help grow your business. By staying informed about the latest trends, techniques, and products, you can provide exceptional service to your clients and set yourself apart in the competitive world of hair styling. Investing in your professional development by attending workshops, certification programs, and networking with other industry professionals is essential to refine your skills and stay ahead of the curve continually.
Offering hair extension services opens up new opportunities to attract a diverse clientele and increase your income potential. As you gain expertise in various extension methods, assess clients' hair types and preferences, and provide aftercare instructions, you can build a reputation as a sought-after hair extension specialist. Remember to market your services effectively by showcasing before and after transformations, utilizing social media, and implementing a referral program to generate more business.
By dedicating yourself to mastering the art of hair extensions and providing top-notch service, you can significantly enhance your stylist offerings and create a thriving, successful business. Embrace the journey of learning and growing in this dynamic field, and watch your career soar to new heights.


Leave a comment